How to Properly Cure Cannabis

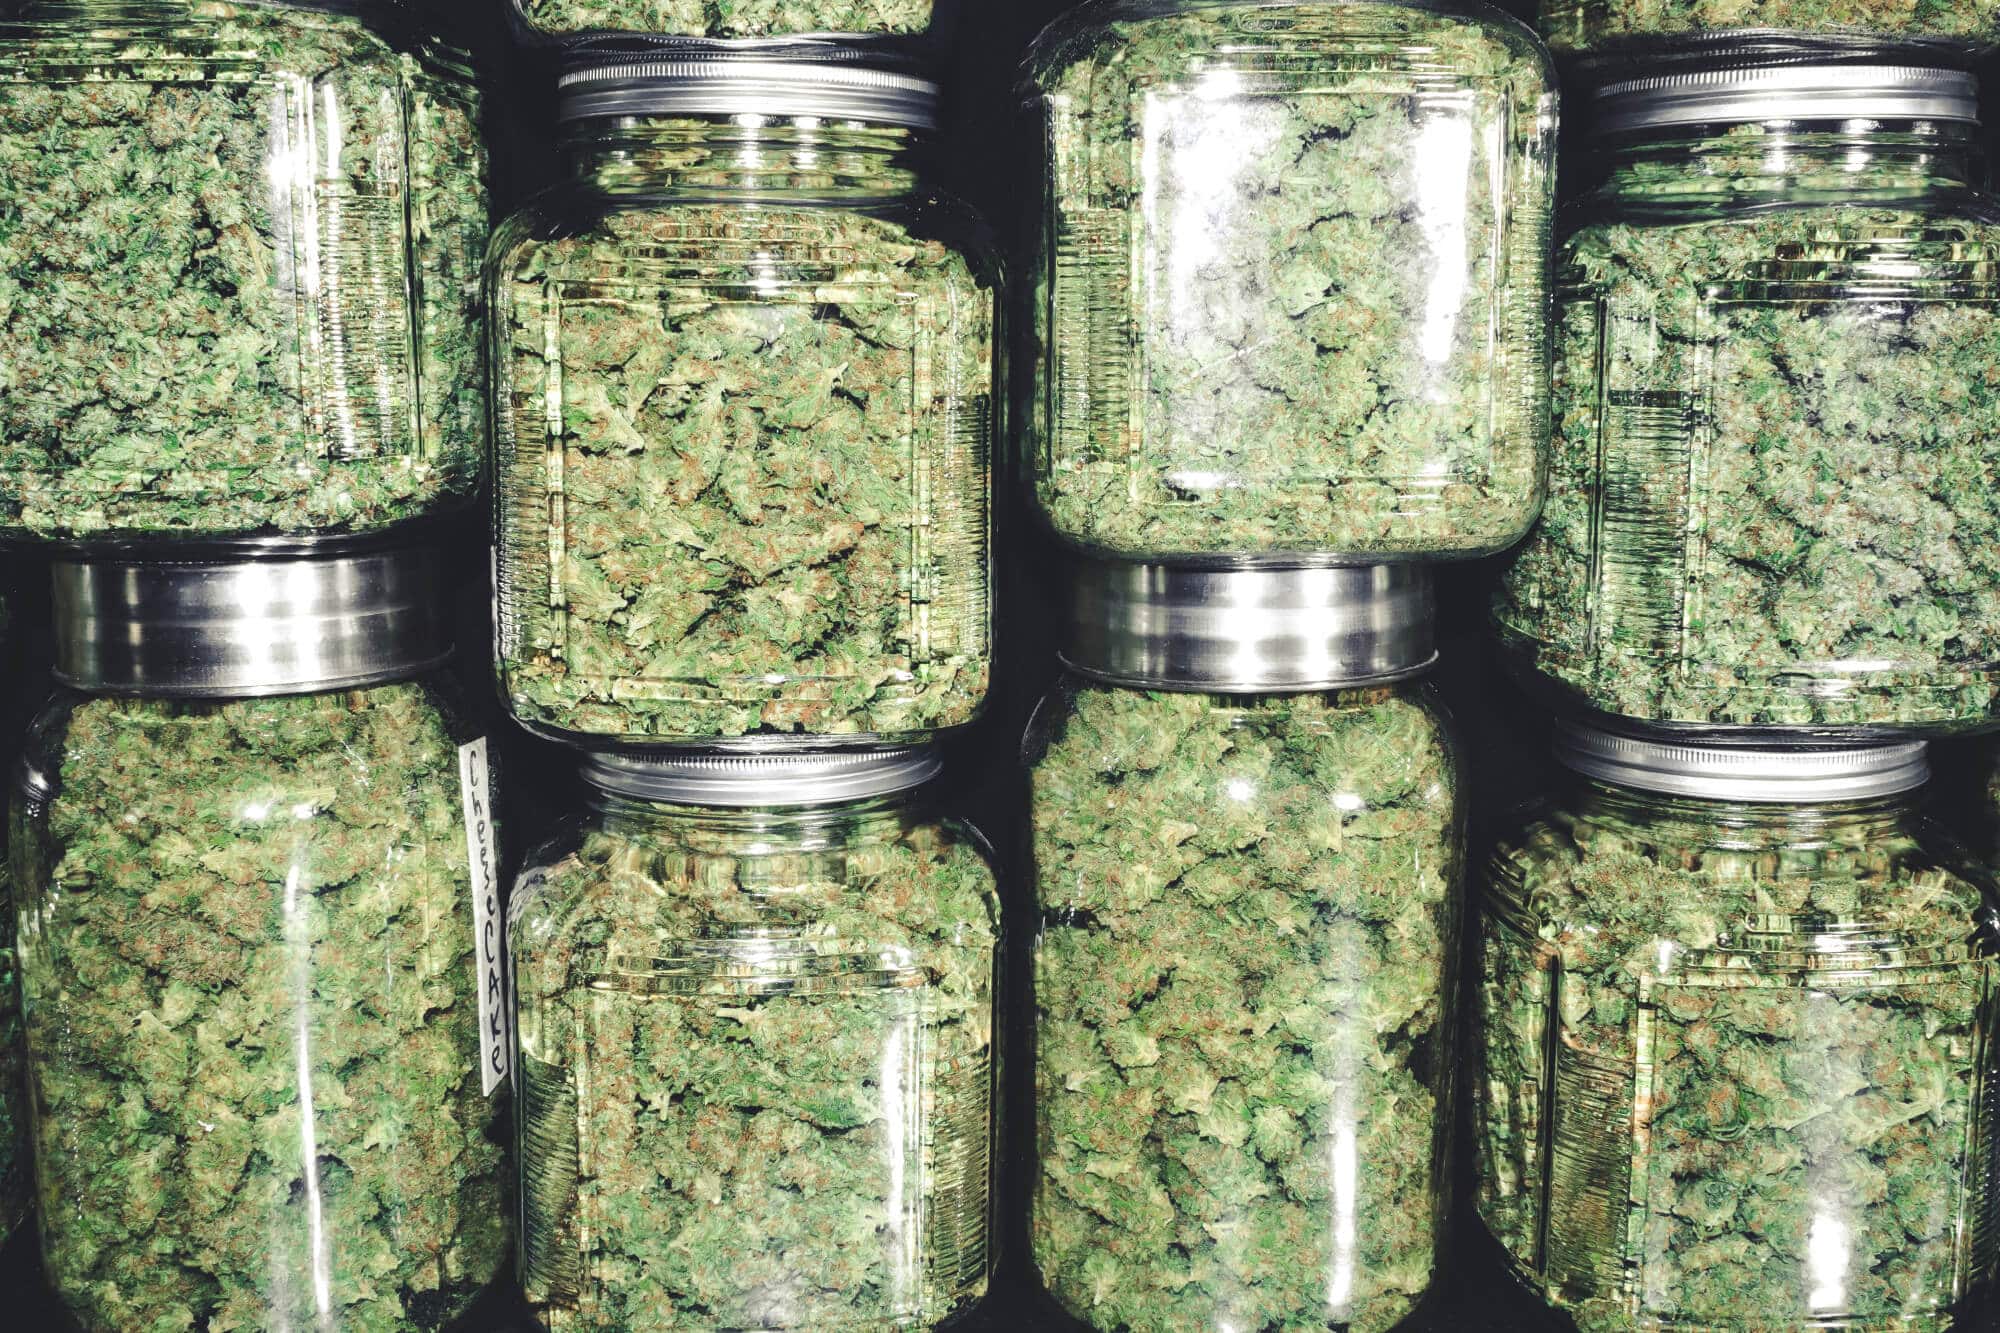
Curing Marijuana in Jars
by Ellis Smith, Co-Founder & Chief Development Officer American Cannabis Company


From the moment your crop is harvested it begins to degrade as enzymes and aerobic bacteria break down excess sugars and starches.  Curing cannabis essentially forces the plant to use up those sugars, starches and excessive nutrients before they have had the chance to dry out and get stuck inside the plant.

Curing is my favorite part of growing cannabis. This is the last mile of the race and you can practically smell the finish line.  Curing provides preservation to your harvested and dried cannabis.  Proper curing stops the degradation process before terpenes and cannabinoids evaporate or transform into less favorable compounds.

Curing can enhance and finish your flowers for the perfect consistency to be burned for your smoking pleasure. This is the final step to finish what you started but do not grow complacent as this is just as important as any of the other cultivation or finishing processes. The goal of the curing process is to slowly remove and evenly distribute the remaining moisture that is in the center of the plant.

My personal preference is glass jars while others use plastic containers, rubber containers, ceramic, etc. Whatever your choice be sure to follow these easy steps to ensure you achieve your desired finished product.

1. Ideally, I like the flower to be about 90% dry with about 10% moisture left to slowly remove. Fill the curing container 50% full of flower so you have plenty of air and space to allow for proper burping/off gassing.

2. Open container and burp the air built up 3 to 5 times per day depending on your access to the curing room. A good schedule to follow is: first thing in the morning, lunchtime, dinner time and just before bed. Let the container sit open for a few minutes or longer depending on moisture content. Repeat this process daily for 7 to 14 days however some growers will cure for 4 weeks. Try a few different durations and find out what works best for you.

3. Allow your senses to help play a role in knowing the cure is properly taking place as the terpenes are being accentuated. If you start to smell sour mold then try and speed up your cure process by leaving the container open to allow for more breathability for the flower. Don’t slow the cure down too much as you will develop mold resulting in foul smelling cannabis.

4. At peak cure enjoy with friends and family. You worked hard and deserve it.

Drying Your Cannabis Plants

Drying Cannabis
by Ellis Smith, Co-Founder & Chief Development Officer – American Cannabis Company


After spending over 100 days nurturing and growing your plants it is now harvest time! Drying your crop is an art form, as many people will tell you it is. The final steps of drying and curing cannabis are crucial to make certain your buds are rich with flavor and retain strong cannabinoid profiles. Although it may seem simple, drying is a stage where you can ruin your crop if not dried properly. You are poised to benefit from the fruits of your labor, so don’t mess it up!

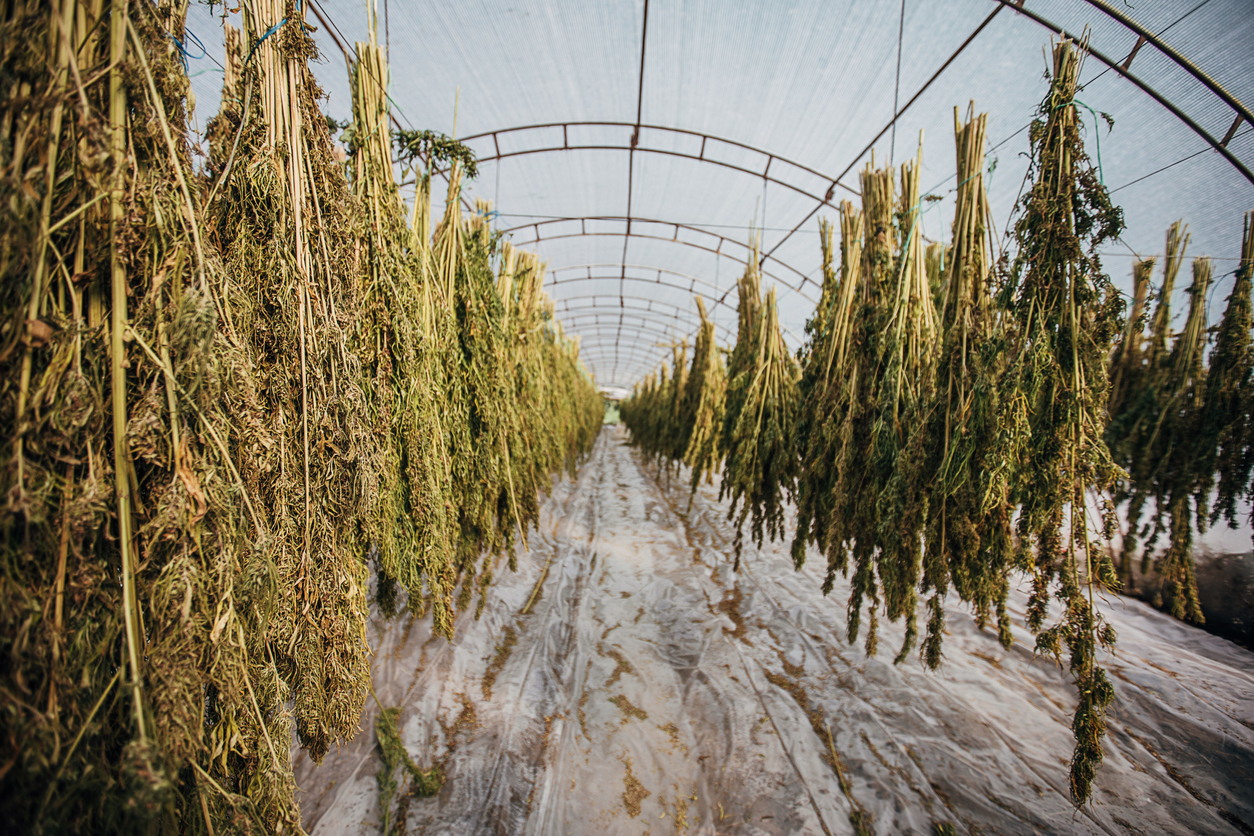
When growing at home ensure you have a few things in place to guarantee success when drying your plants. Your drying space will need to have plenty of air flow; however, you do not want too much air movement as it can dry out your buds too quickly, but not enough air flow could allow for development of mold and mildew. There is a fine line but through trial and error you will find the sweet spot that works best for air flow in your drying room. Your drying room should also be dark during the process, so light does not degrade the THC. The ideal room temperature range is 68 to 75 degrees however you can run higher and lower temps but be sure to check moisture levels by touch to see how slow or fast the process is finishing.

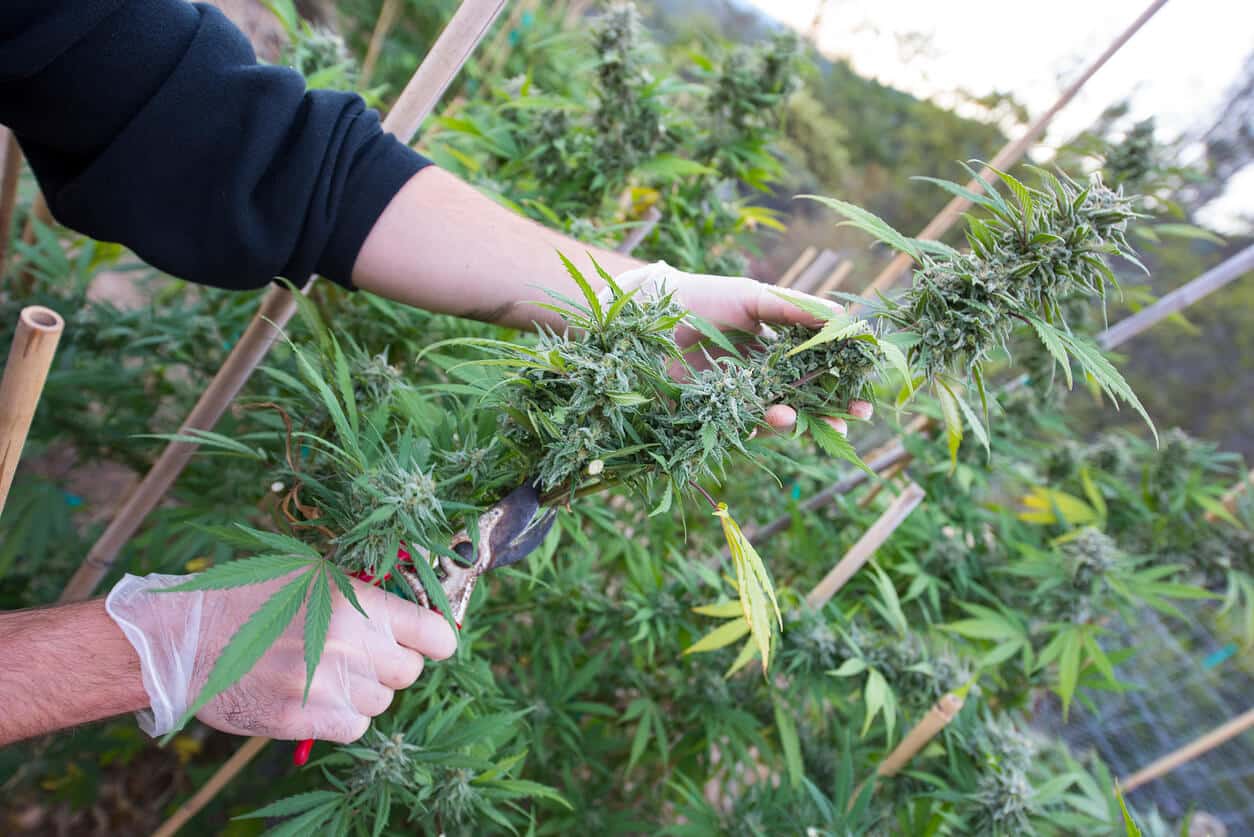
Next take your harvested plants and break them down into smaller branches to hang on clothes hangers. I like to leave the fan leaves on to help cover and protect the flowers as well as help control the drying process. Place the hangers on a wire or rope where they can remain hanging in the darkened dry room for the next 7 to 10 days. As the flowers approach their optimal moisture level, touch them to feel how dry the outside of the flowers are and then squeeze the flower to see how that exterior dryness consistency compares to that of the interior.

Between day 7 to day 10, expect to have about 90% of the moisture content removed so you can trim and begin the all-important curing process….for more information on curing, see article entitled How to Properly Cure Cannabis by Ellis Smith. Once dried you are now ready to pull your flowers off the hangers so you can set up for hand trimming or machine dry trimming which is purely grower preference.

I prefer curing in glass jars and although that is my personal preference, I have used plastic containers before which worked great as well. Regardless of the type of container used, once the flowers are placed in your curing container, continue to keep in a dark place at the same 68 to 75 degree temperature range. Open the container multiple times a day to “burp” any remaining moisture out while monitoring how fast or slow the remaining moisture is being removed. For growers with a busy schedule, you can check once a day as well however you should do this for about 7 to 10 days or until you have reached the desired dryness. You can keep it jarred up and cure longer but that is all personal preference. Once cured, it is time to fully enjoy all of the work you put in.

Insider Tip:

Always check for smell to see if there is a foul odor or mold developing throughout the drying
process.

Why Should I Use Living Soil in My Cannabis Grow?

living soil for cannabis plants

There are many elements that go into producing exceptional quality cannabis plants. Quality genetics is the first “must have” of any top shelf commercial cultivation operation, but one of the most important, yet often overlooked of those factors is the soil medium selected to grow the genetics chosen.  In recent years, the cannabis industry has seen an increased emphasis in producing greener, more sustainable, eco-friendlier products, all of which can be done when growing in living soil.

What is Living Soil?

According to the National Cannabis Industry Association (NCIA), the definition of living soil is the community of microbes working together breaking down organic matter which, in turn, provides valuable nutrition to the plants.

Soil microbes are essential for decomposing organic matter and recycling old plant material. Microorganisms are the unseen majority in soil and make up a huge part of soil’s genetic diversity. This means easier absorption of nutrients by plant roots, reduced need for watering, limited erosion, and improved aeration. A combination of organic materials such as compost, coco coir, peat moss, aged tree bark, manure, worm castings, and more can be used to make a base for living soil. Like all living things, soil needs water, and flows water along the path of least resistance to bring hydration and nutrients to plant roots. Water remains in the soil by storing itself in porous minerals for later use.

Living soil embodies a holistic approach to the cultivation of your plants. It contains billions of microorganisms that mimic an outdoor ecosystem and improve the soil’s ability to provide the nutrients each plant needs.

In order to deliver the proper nutrients, living soil contains a curated blend of:

  • Bacteria
  • Protozoa
  • Arthropods
  • Nematodes
  • Fungi

These microorganisms, along with earthworms, beetles and other insects present in the soil, work to decompose dead organic matter supplied by compost, topsoil, peat moss and leaf mold. In addition, the earthworms, arthropods and nematodes help to till the soil as they move through it, ensuring the nutrients produced by the decomposed dead organic matter are more evenly dispersed throughout the soil, allowing the best possible nutrient absorption by each plant’s roots.

While soil alternatives used in hydroponic grow operations are typically discarded  after each harvest, living soil can be supplemented with compost and other natural additives so that it can be reused for additional grows. This gives you the ability to get multiple harvests out of the same soil, making it a more efficient, affordable and sustainable solution.

Benefits of Living Soil

If you are looking to achieve healthy, high quality cannabis plants while using a truly natural organic growing process (also known as TLO or True Living Organics), living soil will deliver the results you desire. You’ll experience the following benefits when you use living soil:

  • Just Add Water: Eliminates the need for additional inputs fertilizers, pesticides and other chemicals during the cultivation process
  • Promotes exceptional tap and feeder root growth throughout veg and bloom cycles
  • Elimination of additional inputs reduces labor costs which improves profit margins
  • Improves each plant’s ability to fight off pests and pathogens
  • Improves the quality of your harvest with enhanced cannabinoid and terpene profiles
  • Market segmentation by creating new top shelf “organically grown” cannabis category
  • NO FLUSHING IS REQUIRED – With no harmful synthetic based nutrients added, none have to be flushed out, saving growers time and money while providing peace of mind they grew organically.

SoHum Living Soils® Provides the Nutrients Your Plants Need to Thrive

At SoHum Living Soils®, our team of growers, horticulturalists and soil scientists have invested an enormous amount of time refining the cannabis cultivation process in order to ensure our soil delivers the nutrient-rich environment your plants need to thrive in a true living organic method. Our living soil formula was created specifically for use in cannabis cultivation, and it provides an ideal blend of organic nutrients during the vegetative stage and reproductive/flowering stage of the plant.

Get Started Today

SoHum Living Soils® makes it easy to grow the highest quality cannabis plants. You can use our store locator tool to find a retailer near you.  For a deeper dive into cannabis cultivation using living soil, check out “True Living Organics” 2nd Edition by The Rev.

Adjusting Your Environment: How Lighting Affects Cannabis Cultivation

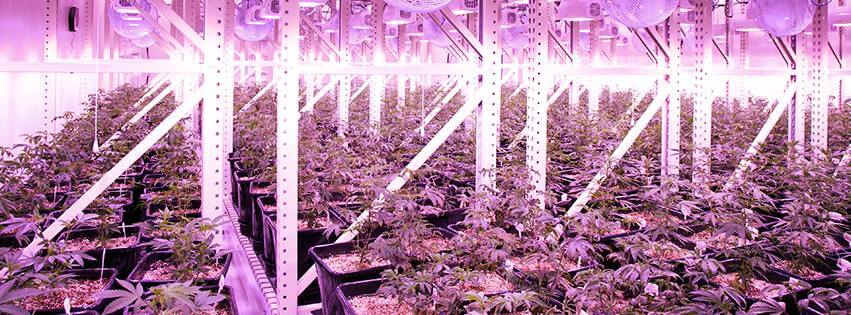
In this webcast, Sean Sangster, project manager for Fluence by OSRAM’s horticulture services team, discusses:

*Horticultural lighting basics and light’s role in plant responses.

*Lighting’s effect on other key environmental inputs in a cannabis facility.

*Considerations for lighting in regard to integrated pest management strategies.

Beyond What The Eye Sees

How to save harvests, money, and maximize yield with spectral imaging for cannabis.

In this webcast, we hear from Rob McCorkle of Emerald Metrics about how spectral imagery is changing the game for cannabis grow operations. By monitoring plants and providing growers with actionable intelligence, the technology at Emerald Metrics dives into cannabis plant health and other issues which would typically go unseen to the naked eye.

While human intuition is incredibly valuable in cannabis cultivation operations, nothing compares to technology. Emerald Metrics uses spectral imagery for cannabis to detect plant diseases, pests, and environmental contaminants that can wreak havoc on a crop. In addressing issues early on in the growth cycles, their spectral imaging systems offer insights to growers, giving them the competitive edge in a vastly changing industry.

Cannabis Temperature For Indoor Grow Rooms

How to get the right temperature for growing cannabis plants

Growing temperature is very important to encourage photosynthesis and promote the health of cannabis plants, especially in grow rooms. Improper temperature can make or break a crop and should be very carefully monitored throughout the plants’ growth cycle.


Temperature and Cannabis Plants

The temperature at which a cannabis plant is grown is vital to the health of the plant. Temperature affects internodal growth, the rate of water absorption, respiration, and the PH level of the growing medium.

Sometimes even small variations in temperature over long periods of time can stunt growth and cause long-term problems in root growth.

Changes in temperature can also be used to simulate nighttime as well as a tool to trigger flowering.


Ideal Temperature In Your Cannabis Grow Room

A standard, well ventilated grow room should be kept between 75-85 degrees Fahrenheit under optimal conditions.

Temperature can be raised or lowered according to your plants’ needs. For example, if you’re providing extra CO2 to your plants, your cannabis grow room temperature should be raised to 86-90 degrees for efficient absorption.

“Nighttime” temperatures should be slightly lower at about 71 degrees to prevent stretching but ensure your plants “sleep” and recover.


Measuring Temperature In Your Cannabis Grow Room

It’s best to measure the temperature in the shade of your grow room, as well as in several different locations.

Using a digital thermometer with a separate sensor will allow you to measure temps from outside of the grow room while the lights are off.


Lowering the Temperature Of Your Cannabis Grow Room

HPS and other high output lights can produce far more heat than is safe for the survival of your cannabis plants.

Always run an extractor fan when using these lights to circulate and pull heated air from your grow room.

If your lights have ballasts or generators, keep them outside the growing area if possible.

You might also consider air conditioning units, but only as a last resort as these can drastically increase your overhead costs.


Increasing the Temperature Of Your Cannabis Grow Room

You’ll rarely need to increase temps during “day” hours, as the lights typically are sufficient. At night, you can hold heat in your space by shutting off the extractor fan.

You may need to add a simple space heater or radiator to supplement nighttime heat, though these can be costly to run.

Monitor the temperature of your grow room carefully (both day and night) and adjust the heat accordingly for maximum efficiency.

The botanical experts at SoHum Living Soil know all of the best practices when growing cannabis. Let us share our knowledge with you by clicking through our articles on the subject or stop by our store in Denver to speak to our knowledgeable staff.

Start growing cannabis the easy way

Quality super soil that yields high results with minimal effort.

Topping Cannabis Plants

when to top cannabis

When to Top Cannabis Plants

Whether you grow indoors or outdoors topping your cannabis plants helps to produce a bigger and better yield, which is every grower’s primary goal. The first thing to understand is that topping is an exact cut at the node, and while that sounds easy, the timing of topping is critical. Topping forces the plant to grow laterally rather than vertically, but when to do so depends on soil health, plant health, lighting, size and age of the plant, and the growth goals.

If you are new to cannabis cultivation, topping cannabis plants is a vital step to maximize the overall quality of the yield. It is a tool that helps to control the overall shape of the plant – by redirecting the growing tendency from vertical to lateral.

The effect is that the supporting branches develop a thicker and stronger cola. Topping,  however, is not the only factor that goes into producing quality and sizable yields. Other factors include soil health, watering, and light.


Topping Cannabis Plants – When is the Best Time?

All plants have stages to their life cycle. So, whether we are discussing an annual plant or a perennial plant, understanding the plant’s lifecycle is essential, especially if you want to control the results of each stage of growth. The key to managing a plant during each cycle has a lot to do with how much light the plant receives.

The vegetative cycle, for example, can last from two weeks to six months. That is a critical consideration because topping a cannabis plant is a traumatic experience for the plant. Therefore you want to top plants when that plant is at its healthiest – giving it additional energy into changing from growing vertically into growing laterally.

That also means that soil health needs to be ideal as topping increases the growing demands for the plant. The first thing you need to understand about topping is that the plant will need additional nitrogen to fuel the development of additional cola.

Healthy – What does that mean? The short answer here is actively growing. However, understand that plant health has a lot to do with watering cycles, light, and soil. Lush healthy plants require all three of these ingredients to produce optimum yield.


The Cannabis Life Cycle

Germination – generally 2-3 days, depending upon species type, mutations, etc. This cycle can also be as short as eight hours if growing conditions are optimum – good soil, proper watering.

Seedling – generally 1-2 weeks (though can be stretched longer).

Vegetative – generally 2-6 weeks, based on pot size.

Read more on tips for growing Cannabis if you’re just getting started.


The Vegetative Stage and Topping Marijuana

When to top a cannabis plant is a big question and it does not always have a perfect answer. This is because species vary, growing environments vary, and of course, there could be mutations – planned or accidental. Those factors all weigh in to determine “when” is the best time to top cannabis. However, the topping is also planned, and you manage a lot of what your plants do by controlling soil, water, and light.

You don’t want to top a cannabis plant too soon. The plant must be able to handle the pruning process. A cannabis seedling can range from 1-2 weeks old, and you would not want to top the plant at week three. It would likely not survive, even though at week three, it should be in the vegetative stage of its development.


Counting Nodes

A good rule of thumb is to count the nodes. A node is a junction on the stem where branches grow from the main stem, and cannabis plants tend to node in pairs. The spacing between nodes is called the “internode.” The internode is the stem that grows from one node to the next. Indica plants tend to have very short internodes, as these plants are short and squat. Sativa plants, which are taller, have a longer internode.  For topping cannabis, you want to have at least four nodes and preferably six-eight nodes. This is a general rule. Topping at four nodes is riskier than topping at six- to- eight nodes as plant health improves as the plant grows.


Lighting

Counting the Nodes is one rule of thumb, but also consider topping when you change the plants light ratio. The shorter the light cycle, the closer the plant moves toward flowering or seeding. You certainly do not want to top a cannabis plant during the flowering stage. By controlling the light, you can extend the vegetative stage of growth. Generally, when the lighting gets to 12 hours of sunlight and 12 hours of darkness, the plant goes into flowering mode, as that signals the plant that the season is changing.


What Physically Happens When You Top a Cannabis Plant?

In the vegetative stage, the plant is putting on height and pouring energy into the main stem. When you top a cannabis plant, the energy that it feeds into growth immediately shifts into healing, and the plant goes into recovery mode. Plants have a competitive need for resources,  even though these plants are grown in a controlled environment, you are still dealing with the genetics of wild plants. It is, in short, a battle for sunlight. When you top at the terminal bud, the lower node suddenly has access to light and from that spot emerge additional cola. You have first stopped the upward momentum of the plant which is now forced to grow laterally.

1. The plant’s focus changes from growing a single cola into producing multiple colas. This occurs because the nodes beneath the topping point now have access to plenty of light, especially with indoor growing technology. You can control this through quality soil and additional water – two ingredients that cannabis needs to produce robust cola.

2. The plant immediately goes into a recovery mode. Having the top portion of the terminal bud removed is traumatic. Recovery means growth so to compensate for the loss, the plant begins to grow and as it does, more cola emerges from the node just below the topping point.


Considerations When Topping Marijuana Plants

The first thing to look at is plant health. A plant that is not getting enough light might have eight nodes but not be in excellent shape. Plants need to be robust, the main stem needs to be developing and the overall growth of the plant is even.

Soil Health is another consideration. As mentioned, the topping is stressful for the plant which is why:

1) plant health needs to be optimal before topping, and

2) soil health needs to be optimal after topping. The plant will need more nutrients to spur lateral growth. Growing uses energy, so the plant must have access to good soil energy, which in this case is nitrogen.


Boosting Plant Growth and Health

You can do yourself and your garden a favor by starting off with good quality soil and providing adequate water throughout the growing cycle. Also, plan each step and understand that the differences among species of cannabis will require different timing for topping.

This is not just indica vs. sativa. The requirements will vary from one strain of cannabis to the next. It is helpful to keep a growing journal so that you can build wisdom as you grow.

Start growing cannabis the easy way

Quality super soil that yields high results with minimal effort.

Cultivation Requirements for Cannabis Plant Growth

Cultivation Requirements for Plant Growth


A growth medium is one of the most important elements of health for any plant. The classic growth medium, of course, is outdoor soil.

Over the years, growers have experimented with a wide range of solid, semi-solid, and liquid growth media, each with unique traits. The right growth medium is essential to ensuring that the plant steadily receives all the nutrients it needs.


1. Warmth

No matter where they are naturally found, all plants require sufficient warmth to thrive. For all living things, biological activity decreases as temperatures decrease. Plus, cold air simply has less life-giving moisture than warmer air.


With sufficient warmth, cells throughout the plant are empowered to engage fully in photosynthesis, converting heat from sunlight into energy.


2. Sufficient Light

Plants are unique in that light is essential for them throughout their entire lifespan. As sunlight reaches a plant, the green pigment called chlorophyll absorbs it.

This generates the energy to meet systemic demands for photosynthesis, where carbon dioxide is

altered into a natural food source. The process also results in the oxygen we all breathe.


3. Enough Water

Water is the other key element in photosynthesis. Without it, plants wither and die. Unlike light and air, water must usually be absorbed through the root system.

Roots carry the water to all of the leaves, flowers, and other components of the plant.

Along with carbon dioxide, water is the fuel transformed by chemical action into glucose, sugar the plant uses for growth and repair.


4. Proper Nutrients

All plants require certain essential nutrients. Some flourish with a different ratio of elements than others, but all of them need the same basic building blocks.

For example, all fertilizers must contain some amount of nitrogen, phosphorous, and potassium to be effective. This is the key to the best possible blend of super soil: Delivering the right nutrients in the right combinations through natural, highly bioavailable sources.

If you are on the hunt for organic super soil for sale, you needn’t look any further. Our living soil for sale is completely organic, developed by and for growers. It can be used with ease in both indoor and outdoor growing environments – and it’s ideal for demanding crops throughout the entire annual life cycle.

Start growing cannabis the easy way

Quality super soil that yields high results with minimal effort.

Nutrient Deficiency in Cannabis Plants: Expert Guide

Nutrient Deficiencies in Cannabis plants will destroy their chance of growing into large, blooming buds. Growers use nutrients to grow big, beautiful, sticky buds. Whether you’re growing soil or hydroponic, plants need precise ratios and levels of properly configured nutrients or amendments to ensure your crop meets expectations. However, the mishandling and improper balance of them can have a negative impact on your grow.

Your garden will suffer when plants are given the wrong kind of nutrients, when they are fed nutrients at the wrong time, when they are fed too much of a given nutrient, or when they have not had enough of a nutrient. Here are some common problems associated with nutrient deficiency:

Nitrogen Deficiency in Cannabis Plants

Cannabis grows fast and requires generous amount of nitrogen as it matures. Nitrogen is part of a group of three primary nutrients for plant growth; the other two being phosphorus and potassium (more on this later). This nutrient can be found mainly in the leaves and shoot tips of the plant. Nitrogen is responsible for many of the healthy developments of the plant; including the production of enzymes, proteins and chlorophyll. Chlorophyll is the component responsible for the green color of leaves, seeing leaves turn yellow is a telltale sign of Nitrogen deficiency

Causes:

  • Pests
  • Undersized containers
  • Poor Soil Quality
  • pH Imbalance
  • Lack of fertilizing

Symptoms:

The lower leaves yellow between the veins. Eventually, the whole leaf will become yellow. It will wither and die and plant growth will become inhibited.

The plants will stay short and underdeveloped if nitrogen deficiency is severe in the growth phase.

During the flower stage, nitrogen deficiency can lead to a decrease in your crop’s yield. Please keep in mind, during the last three weeks of flowering, healthy plants will not require nitrogen.

Yellowing and the shedding of leaves is a natural part of the final weeks of flowering.


Phosphorus Deficiency in Cannabis Plants

Phosphorus is required at all stages of plant development, especially during root and bud growth. This nutrient is necessary component of enzymes and proteins.

There are a lot of chemicals that contain high levels of phosphorus and in doing so, supposedly increase bud production.

This results in plants having extremely high dosages of phosphorus, making them overfed.

Causes:

  • Poor soil quality; loamy or waterlogged soil
  • A pH imbalance
  • Lack of fertilizing
  • Over-Fertilization

Symptoms:

In younger plants, a phosphorus deficiency will slow growth. This underdevelopment will lead to a poor root zone and small bluish-green leaves.

Plants in the flowering stage of development will have leaves turn reddish-purple. Bud growth and yield will be low if a phosphorus deficiency sets in during early to mid-flowering. Further, plants will have an overall lack of vigor and resistance to pests.


Potassium Deficiency in Cannabis Plants

Potassium should be made available to the plant through out the entire life cycle of the plant. Potassium is important for the generation of energy, as well as improving plant and root growth. As such, it plays an important part in regulating transpiration, the manufacture of chlorophyll, starches and sugars.

Causes:

  • Poor soil quality
  • Over-fertilization

Symptoms:

A potassium deficiency is similar to a nitrogen deficiency; the leaf deterioration shares a resemblance but one differentiation is the rust-colored spots. Potassium deficiency may turn healthy leaves brown; this is due to a disruption in transpiration. In severe cases, stems will become brittle. This deficiency is most common in flower phase and will dramatically impact yields.


Magnesium Deficiency in Cannabis Plants

This is one of the most common nutrient deficiencies in indoor cultivation facilities. This occurs because of factors that can inhibit the uptake or availability of Magnesium.

The purpose of magnesium is to encourage strong, healthy veins and stimulus of the creation of leaves. Also, it plays an important role in breaking down enzymes and producing chlorophyll.

Causes

  • Acidic soil
  • Over-fertilization
  • High calcium content

Symptoms

First indications of this problem are similar to nitrogen deficiency, the lower to middle leaves yellow between the veins. Eventually, the entire leaves will become yellow.

The telltale sign of Magnesium deficiency are the rusty spots that appear dotted throughout the leaves. This will distinguish Mg deficiency from lack of nitrogen.

Also, leaf edges appear necrotic and curl up. Some leaves develop a whitish tinge.


Start growing cannabis the easy way

Quality super soil that yields high results with minimal effort.

How Much Water Does It Take to Grow Cannabis?

How much water do your cannabis plants need?

One of the challenges of growing cannabis indoors is knowing how much water to feed your plants. In nature, plants have the advantage of natural rainfall and drainage and only need to be watered during drought conditions.

Watering your indoor plants too little or too much will stunt production, and water waste can drastically increase your overhead. So how do you get it right?


How Much Water Should You Add to Cannabis Plants?

A good standard to work with is one gallon of water per day for each pound of processed flower you expect to harvest from each plant. The finished weight will obviously change according to how long you allow your plants to veg before forcing flower, so adjust your water per plant accordingly.

This ratio was determined by the Emerald Growers Association and the Mendocino Cannabis Policy Council after polling numerous cannabis farmers about their water usage.


How Much Water Does It Take To Produce a Standard Eighth Of Cannabis?

1.875 total gallons per 1/8th of usable cannabis.

Use this figure when calculating your overhead costs if you’re adhering to the 1:1 ratio of one gallon per day per pound of processed flower.


How Often Should You Water Your Cannabis Plants?

Your watering schedule will vary according to the temperature of your grow area as well as the strain, health, and size of your plants. When determining a watering schedule, observe your plants every day.

Do the stalks look rigid or weak?

Do the leaves look colorful and vibrnt or do they look droopy and pale?

Also, consider utilizing gravity-fed watering systems that allow plants to take water in from the bottom u, taking the guesswork out of the equation.


How Do I Water Cannabis More Efficiently?

By following the below points, you’ll increase your chances of having success with growing cannabis:

• Use SoHum Living Soils® for best moisture retention and drainage
• Install a drip line system for maximum water control
• If you find yourself using more than the 1:1 ratio, consider moving your plants to larger pots to retain water longer
• Monitor your plants daily; as cannabis plants are living beings and can be unpredictable
• Utilize gravity fed watering systems or bottom watering containers
It is imperative to calculate water costs when growing cannabis. If a grower is not careful, the financial and environmental impacts of using too much water can be extreme.

At SoHum Living Soils®, our team consists of experts on growing cannabis, and our website features many articles on best practices.

For a more personal experience, contact us with questions or visit our store in Denver to speak with our knowledgeable team about your cultivation questions.