The Challenges of Growing Cannabis Indoors vs. Outdoors

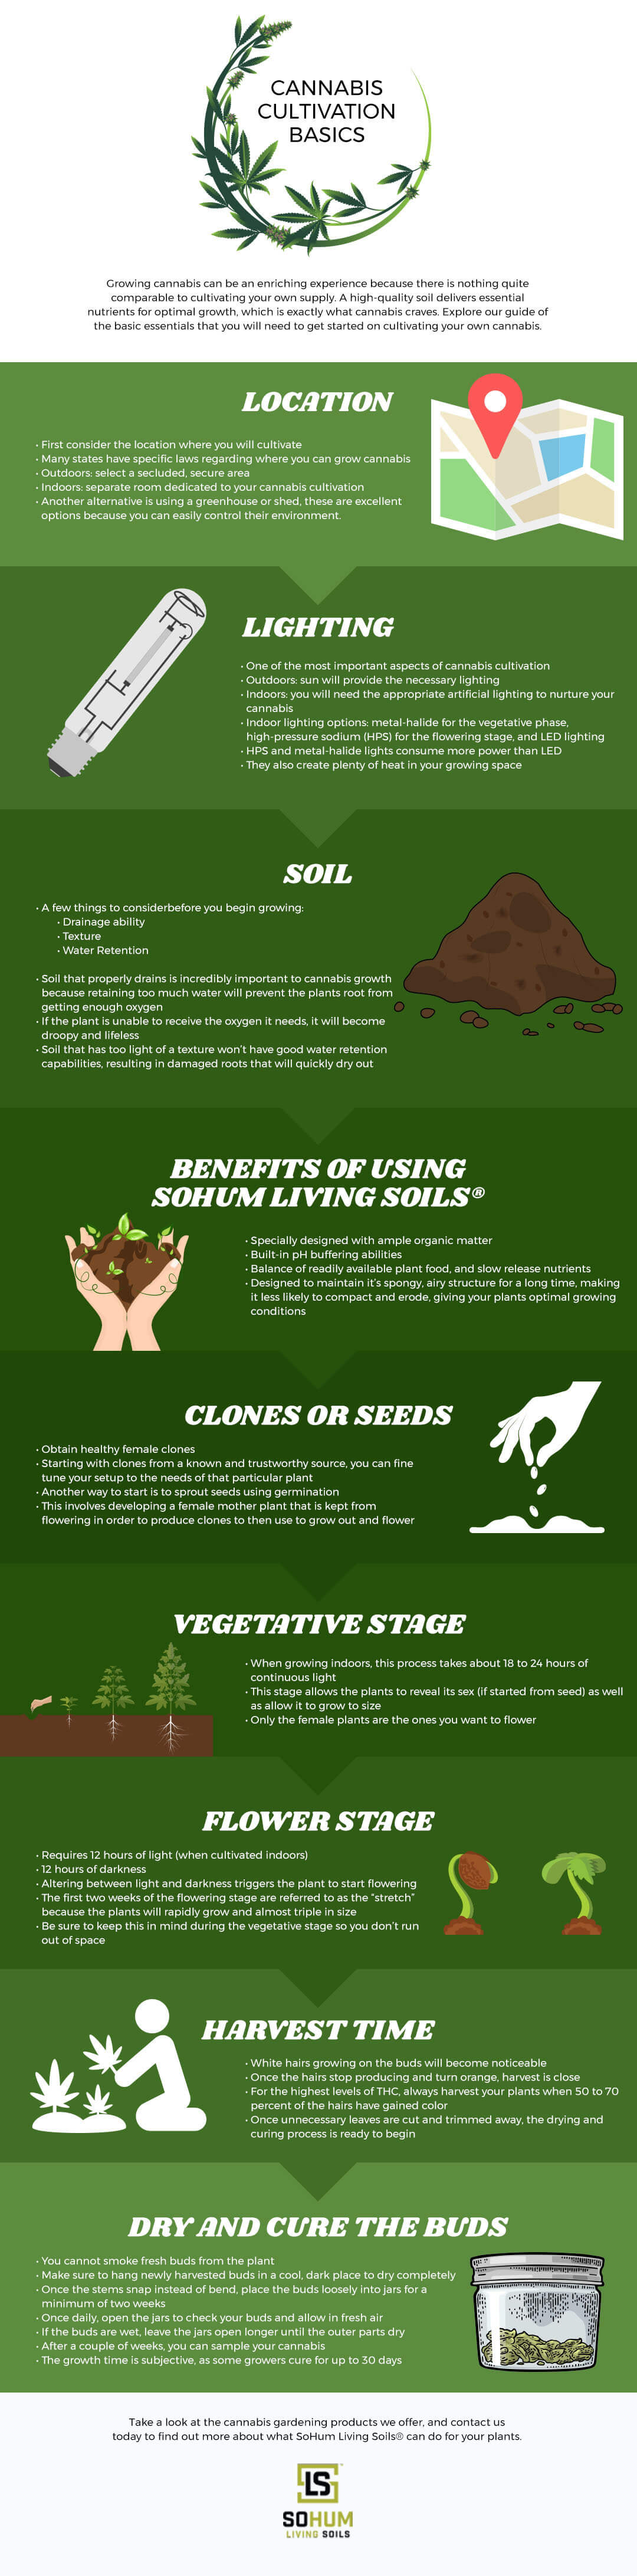
Cannabis cultivation is one of the oldest farming trends in human history. Many states now have laws on the books allowing individuals to cultivate cannabis crops. New growers will have to decide whether indoor or outdoor cannabis growing is the path they wish to pursue. Finding success with initial crop yield becomes easier when there is an understanding of the challenges presented by both methods.

Indoor Cannabis Growing Challenges

Cultivating cannabis crops indoors allows growers to shield their product from the outside world while maintaining full control of the environment. That control makes farmers fully responsible for everything related to their cannabis plants. The grower assumes responsibility for adding needed elements to the environment and making sure nothing harmful intrudes into the indoor space.

Proper Set-Up

The first thing indoor farmers need to think about is how they are going to house their plants. The size of the initial set-up does not matter. New growers may want to think carefully about going too large too fast. Starting with a small plot allows room to experiment with the methods used for cultivation.

Farmers need to make sure that the space they start with has room for equipment like ducts, fans, and other items required to keep the environment optimal for cannabis farming. Many new growers underestimate how large their plants will get and do not leave enough room for everything. They may also fail to do enough to block out light during needed dark periods. That can end up disrupting a cannabis plant’s growth cycle and cause the creation of male flowers.

Battling Root Rot

Many growers use deep water culture as their indoor cannabis growing system. While using this method can promote faster growth, farmers need to be careful about monitoring the roots of their plants. Failing to change out the water in the reservoir regularly can lead to root rot and end up ruining the entire crop. Consider using living soil in your cultivation

Getting Your Soil Mixture Right

Finding the best soil for an indoor growth system is an essential part of establishing a crop. It is an easy process to pick up and is more forgiving of human errors like going too heavy on nutrients.

However, farmers need to be careful not to allow the soil to get overly dry. They may also not realize the importance of doing pH checks on the water fed into the soil. 

Outdoor Cannabis Growing Challenges

Growing cannabis outdoors allows nature to assist in providing cannabis plants with much-needed nutrients in the soil. The trade-off for that is the control given up by farmers who must be prepared to continually adapt to environmental changes.

Soil Preparation

Building up a quality base soil is key to getting a successful outdoor cannabis crop established. Many growers find it tempting to use Miracle Grow or other similar products. Plants end up getting deprived of much-needed nitrogen during vegetation and end up getting too much during the flowering period.

Cannabis growers should also be careful about overwatering their crops. Many make the mistake of failing to check the pH or may cycle in nutrients too frequently or unnecessarily.

Dealing With Pests

Outdoor cannabis plants are more susceptible to infestation from pests like caterpillars, spider mites, and grasshoppers. There is also the threat of fungus flies consuming your root system. Birds can drop in and eat new seeds before they have a chance to become established. Farmers who do end up with a flowering crop must then deal with animals like deer who may want to snack on the plants.

Surviving the Weather

Growing cannabis plants outdoors means placing a crop entirely at the mercy of mother nature. Dry weather, rainstorms, and other conditions can end up wiping out an entire field, costing farmers all the time, money, and effort put in up to that point.

Challenges for Both Methods

While indoor and outdoor cannabis cultivation each have unique problems, there are some issues farmers will run into using either method.

Complying With Regulations

Remember, while the laws in a state may make cannabis growing legal, doing so remains illegal per the federal government. Farmers also need to make sure their crop setup complies with local and state laws established around cannabis growing. New growers who fail to do their homework could end up having their entire crop confiscated and face some severe fines depending on where they live.

Controlling Odor

Some strains of cannabis can produce a very pungent odor into the air. That scent may not be something appreciated by everyone living in the area. Farmers can get into trouble if they live in a town or city with strict regulation around controlling the odor from cannabis cultivation. Growers need to have reserves on hand to purchase filtering systems or other devices meant to control the smell.

Establishing Solid Operating Standards

It is essential for growers to set down and follow standards to follow on cannabis crop cultivation. Many new farmers do not bother to schedule and document when they perform specific tasks like watering and nutrient cycling. That causes them to get thrown off-track and do either too much or too little to contribute to the viability of their cannabis crop. 

Get Expert Help With Your Soil

Are you having some trouble finding the right soil for your cannabis farm? SoHum Living Soil® takes a lot of the guesswork out of maintaining soil for indoor and outdoor cannabis growers. Call today at (866) 308-0750 to discuss how we can help you achieve your desired cannabis crop results.

What is the Best Soil for Cannabis, Weed, and Marijuana?

What is the Best Soil for Cannabis, Weed, and Marijuana?

Choosing the Best Soil for Growing Cannabis

Everyone has heard about people just growing cannabis in their backyard or out in the woods. Yet as with any crop, growing cannabis in regular soil really is not ideal. If you have ever grown fruits or vegetables, you know that different types of plants need different nutritional content. Even growing something as simple as grass requires specific soil acidity levels and fertilizers.

In this article, we will cover why growing cannabis in regular soil is not ideal, what the best type of soil really is, and tips for getting the best grow.

Why Regular Soil Is Not Ideal for Growing Marijuana?

When starting a traditional garden, many gardeners have to spend months enriching their soil. But even enriching soil is not always ideal for growing marijuana. If you have been to a garden center, you may have noticed that there are different blends of soil for things like succulents, flowers, vegetables, and fruits. Different types of plants need different levels of nutrients. Soils tend to differ in five major ways: drainage, nutrients, texture, pH level, and water retention.

What is the Best Soil for Cannabis?

There are dozens upon dozens of different brands of soil. What you will need to look for is soil that has the right blend of attributes for your marijuana plants. Here is what you need to know:

  • Drainage. Some plants will rot readily if their roots are allowed to remain moist. High drainage soils are frequently used for plants such as succulents, in order to make sure that their roots dry out quickly. The addition of things like “perlite” improve drainage. Cannabis does not need high drainage. Moderate to low drainage is fine.
  • Water retention. This controls how long water will be retained in the soil. If you have soil with low water retention, you will need to water your plants more frequently. Cannabis plants like water, which means you want soil with high water retention. Soils that include peat moss are a good choice, as this keeps the soil moist.
  • Nutrients. If you are growing cannabis, it is very likely that you are going to be adding a nutrient base of fertilizer to your soil regardless. That means that in terms of nutrients, you really just want a high quality, general purpose soil. Many prefer organic soils, to ensure that the cannabis that they receive will be organic. Organic soils do not have added chemicals that could be harmful.
  • Texture. The texture of your soil can range from a coarse soil to a very silt-like soil. In reality, this does not matter so much for cannabis: you can choose a soil texture that makes the most sense in your setup. If you are growing in pots, you may want a potting soil that holds together better. If you are planting outside in raised garden beds, you may want a heavier, more clay-filled soil. pH level. This is the acidity or basicness of the soil. Cannabis tends to prefer its environment to be slightly acidic. In general, the best soil for cannabis is going to be between 6 to 6.8 pH.

These are all the attributes of the soil itself. You can alter these attributes through the use of fertilizers. For instance, frequently you may add nutrients such as nitrogen to the soil through a fertilizer. Because of this, getting the right blend for your marijuana plants is actually a bit complex. You may need to fine-tune your soil and fertilizer combination over time, and if there are any issues you see in your plants (such as wilting) they may be directly related to soil, drainage, light, or any other number of factors. Consider taking the guesswork out of having to mix fertilizers or nutrients by utilizing a fully amended living soil, such as SoHum Living Soil®.

Tips for Growing in Higher Quality Soil

Contact us today, and you will be on your way to high-quality marijuana plants.

Why Cannabis Soil Is a Top Choice for the Home Grower

cannabis soil
For large scale dispensary operations and cannabis facility design, the decision to grow with soil or hydroponics is based on many factors. But as cannabis laws and regulations continue to expand ways in which people can legally grow, consume and sell marijuana, home growing operations are becoming more popular than ever. While the average home grower does not need to worry about cannabis licensing and cannabis marketing, they do need to carefully consider what growing medium to use.
 

Three Immediate Advantages to Choosing Soil for the New Grower

 
The choice boils down to hydroponics, aeroponics, and soil. While people tend to picture plants grown in water when they hear hydroponics or aeroponics, that actually refers to plants grown in any medium other than soil, including sand and gravel. So while all operations based in soil growing will have some very marked similarities, there is an extremely wide range of hydroponic systems, each with their own set of factors and concerns.
 
For instance, while all soil growing operations require a grower to take care that their plants are receiving the right amount of water, a grower using a water hydroponic system does not have to worry about watering plants, while someone using a sand hydroponic system must take that into account. And that is one of the big advantages of choosing soil: because soil growing operations are all fundamentally similar, especially when broken down to indoor/outdoor and container and planted in the ground, there are more resources for the soil grower, especially when it comes to initial set-up and troubleshooting, than there are for hydroponics. It is very easy to find a guide for a soil set-up that will meet a home grower’s specific needs and variables, whereas hydroponic systems tend to more unique, as well as expensive.
 
And while the concept of using hydroponics to grow plants is hardly new; it has been going at least as far back as the time of the Aztecs, for the average home grower, it remains a novel concept. For the person who is just getting started growing cannabis, hoping to apply their previous gardening experience to cultivating marijuana, soil is the clear choice because home gardening experience does carry over.
 
A final advantage involving initial set-up is the cost, and almost always, the initial set up cost is less for soil than it is for hydroponics or aeroponics.
 

So in terms of getting started, soil has some very clear advantages:

  • It is easier to find helpful resources to help set up and troubleshoot.
  • Previous home gardening experience carries over.
  • Initial set up costs are lower.
 

The Cons of Choosing Soil

 
With all of these advantages to initially choosing soil, you may wonder why hydroponics remains such a popular choice for marijuana cultivation. For a home grower looking to maximize yield above all else, then hydroponics might be the right choice, but for many home growers, quality is valued much more over quantity, so the ability to cultivate the ‘right’ plant, is more important than having the fastest or largest harvest. Many a soil grower believes that soil-grown cannabis produces a better taste than hydroponics.
 
There are a couple of other important advantages to growing hydroponically. Pests that can damage a crop tend to live in the soil, so removing that also removes the threat of pests. The soil grower, especially the outdoor soil grower, must be vigilant and take measures to prevent any infestation of possible pests. For a container grower, switching the soil between every planting cycle will go a long way towards eliminating the threat of pests, and has the added advantage of being able to guarantee the grower is able to get the precise mix of nutrients and fertilizer that they want, every time.
 
Finally, there are those hydroponic growers who believe that their set-ups are the lowest maintenance operations. The lowest maintenance operation is always the one that each individual grower has perfected and best fits their own needs and goals, and for some, this is a hydroponic set-up, but it takes a large investment of both time and money to create a low-maintenance hydroponic growth operation.
 

So while soil is an excellent choice for the home grower there are some advantages to hydroponics:

  • Hydroponically grown cannabis may grow faster.
  • Hydroponic harvests tend to yield more.
  • Hydroponic plants can be susceptible to pests.
  • Some well-established hydroponic set-ups are very low-maintenance.


The Long-Term Advantages of Choosing Soil:

 
There are several long-term advantages to choosing soil that has nothing to do with the experience level of the grower. One of the largest is the taste of the harvested plant. And while that is, of course, a subjective metric, many experts believe that the flavor of soil-grown is superior. Another similar characteristic where soil has the advantage is how much easier it is to do completely naturally or officially organic. Many hydroponic systems require chemicals to be added that are neither natural nor organic and whether it is due to the grower’s personal preference, or having an all-natural product is important for cannabis marketing, that can often be a deal breaker.
 
Another big long-term advantage is maintenance. While each hydroponic system will have its own level of maintenance, some of which are fairly complex, all soil systems have a pretty even level of maintenance, where the main components occur during planting and in the watering stages. On the whole, the level of maintenance required by a soil system tends to be simpler, more straightforward and more inexpensive than hydroponics. Overall soil systems tend to be slightly more forgiving to inattention on the part of the grower. While having the wrong PH or nutrient levels in a hydroponic system can spell disaster for an entire crop if not quickly corrected, with a soil system, it’s more likely to be salvageable even if not corrected right away. The flip side of this is that problems can be slower to emerge and treat, but for hobbyist growers, for whom this is not a full-time job, having an operation that allows them to forget checking nutrient levels every so often is a worthwhile trade-off.
 
Whereas the choice to go with hydroponics or soil is an important one to every cannabis grower, when it comes to the home grower, especially the home grower who is just getting started cultivating cannabis, soil has some very marked advantages. Contact us today for more information!

How to Grow Bigger Cannabis Buds Outdoors and Indoors

How-to-Grow-Bigger-Cannabis-Buds-Outdoors-and-Indoors

There is no greater feeling of success for the personal cannabis gardener than finding the perfect big bud on your plant. It is not difficult to get big buds if you know how to properly set-up and maintain your plants. Essentially, successful growth of big buds comes down to manipulating the growth of your plant, getting it some good light, and making sure it has the right nutrients.

Pruning and Training Your Plants

Successful growth of your plants is mainly about controlling where your plant will produce its buds. Buds come from nodes where leaves and branches grow from the main stalk. To get the biggest buds, it is ideal to keep all of your nodes at approximately the same height. Plants do not usually grow all of their nodes at the same height naturally, therefore, this takes some intervention from the gardener. You have two primary ways to do this:

  • Pruning – Cut off the nodes that are lower down on the plant. Some gardeners have a hard time justifying this because it is effectively removing some places where your plant was planning to produce buds. However, the results are worth it. When buds start growing low on the plant, they don’t get enough light, because the top of the plant is shading them. If you leave those nodes on, your plant will waste energy trying to feed the lower buds that don’t have a chance of getting very big. Prune away the lesser nodes to give your remaining flowers the best chance at growing large.
  • Training – Training is the other way to keep all of your buds at the same height to ensure they are getting enough light. Plants naturally grow unevenly, with some stalks and branches not reaching the height of others. To correct this, crop off the top of the plant or use ties to shape it to make all the branches the same height. When the branches are the same height, the plant disperses equal nutrients and helps every bud get the ideal amount of light.

Light for Cannabis Plants

As previously discussed, lighting is a major key. Your plants should be spaced out enough so every part of the plant can get good light. If you are growing indoors, you can have complete control over the lighting, so it’s important that it’s set correctly. Avoid exposing your plants to too much light, this can burn the top of your plants and damage your buds.

Feed Your Plants

If you want your plants to produce big, bountiful buds, they are will need excellent nutrients to keep them healthy. Things like nitrogen and phosphorous can play huge roles in creating massive buds if you use the right amounts at the right time in the process. For example, nitrogen helps the plant grow strong early in the process. If your plant gets off to a healthy start and grows big quickly, it will be able to produce bigger flowers later.

Once the plant starts to produce its buds, it needs less nitrogen. It is at this point that phosphorous will be more useful because they help the buds become big, heavy, and dense. There are composts and other things you can add to the soil throughout the process to help your plants along, but the most important thing is to start with great soil. Explore our FAQs to learn about the best cannabis soil and how you can set your plants up for success.

Where to Buy SoHum Living Soils®

SoHum Living Soils

SoHum Living Soils® has been carefully crafted to help gardeners produce plants with big buds. Our soil is excellent for growing just about anything, but it is especially useful for growing cannabis, giving it a considerable advantage over other commercial soils. It does not require tilling, and it is balanced to give your cannabis plants the best chance at creating big buds. That’s why so many successful growers trust their plants to living organic soils.

Many gardeners are torn when it comes to things like fertilizers. They want their plants to grow big and strong but are wary of the undesired side effects that can occur from using chemicals on your plants. We offer the natural products needed to keep your plants growing and producing a significant yield of large buds. It is not necessarily about working harder– it is about working smarter. You can do precisely that when you let SoHum Living Soils® provide excellent nutrition to your plants throughout the entire lifecycle. Contact us today to learn more about h

Cannabis Cultivation Basics [Infographic]

Cannabis Cultivation Basics

Due to the recent legalization of medical and recreational marijuana in areas of the U.S., it’s becoming more common for people to test out their green thumb and try their hand at growing cannabis. Growing cannabis can be an enriching experience because there is nothing quite comparable to cultivating your own supply. A high-quality soil delivers essential nutrients for optimal growth, which is exactly what cannabis craves. Explore our guide of the basic essentials that you will need to get started on cultivating your own cannabis.

View the Infographic

Location

You should first consider the location where you will cultivate. Many states have specific laws regarding where you can grow cannabis. When growing outdoors, it is important to select a secluded, secure area. When growing indoors, it is recommended to have a separate room dedicated to your cannabis cultivation. Another alternative is using a greenhouse or shed, these are excellent options because you can easily control their environment.

Lighting

Lighting is one of the most important aspects of cannabis cultivation. If you are growing outdoors, the sun will provide the necessary lighting. However, if you are growing indoors, you will need the appropriate artificial lighting to nurture your cannabis. There are many options for indoor lighting including metal-halide for the vegetative phase, high-pressure sodium (HPS) for the flowering stage, and LED lighting. One thing to keep in mind when choosing proper lighting is that HPS and metal-halide lights consume more power than LED. In turn, they also create plenty of heat in your growing space.

Soil

When growing cannabis in soil, there are a few things to take into consideration before you begin growing. These include:

  • Drainage ability
  • Texture
  • Water Retention

Soil that properly drains is incredibly important to cannabis growth because retaining too much water will prevent the plants root from getting enough oxygen. If the plant is unable to receive the oxygen it needs, it will become droopy and lifeless. Alternately, soil that has too light of a texture won’t have good water retention capabilities, resulting in damaged roots that will quickly dry out.

Benefits of Using SoHum Living Soils®

Specially designed with ample organic matter, our soil has built-in pH buffering abilities. It has a balance of readily available plant food, and slow release nutrients throughout the plant’s life. In addition, our soil is designed to maintain it’s spongy, airy structure for a long time, making it less likely to compact and erode, giving your plants optimal growing conditions.

Clones or Seeds

The easiest way to start cultivating your own cannabis is to obtain healthy female clones. When starting with clones from a known and trustworthy source, you can fine tune your setup to the needs of that particular plant. Another way to start is to sprout seeds using germination. This involves developing a female mother plant that is kept from flowering in order to produce clones to then use to grow out and flower.

Vegetative Stage

Once your cannabis has sprouted and developed into actual plants, they will enter the vegetative stage. When growing indoors, this process takes about 18 to 24 hours of continuous light. This stage allows the plants to reveal its sex (if started from seed) as well as allow it to grow to size. Remember, only the female plants are the ones you want to flower.

Flower Stage

The flowering stage requires 12 hours of light (when cultivated indoors) and 12 hours of darkness. Altering between light and darkness triggers the plant to start flowering. The first two weeks of the flowering stage are referred to as the “stretch” because the plants will rapidly grow and almost triple in size. Be sure to keep this in mind during the vegetative stage so you don’t run out of space.

Harvest Time

Over time, white hairs growing on the buds will become noticeable. Once the hairs stop producing and turn orange, harvest is close. For the highest levels of THC, always harvest your plants when 50 to 70 percent of the hairs have gained color. Once unnecessary leaves are cut and trimmed away, the drying and curing process is ready to begin.

Dry and Cure the Buds

To the dismay of many growers, you cannot smoke fresh buds from the plant. Make sure to hang newly harvested buds in a cool, dark place to dry completely. Once the stems snap instead of bend, place the buds loosely into jars for a minimum of two weeks. Once daily, open the jars to check your buds and allow in fresh air. If the buds are wet, leave the jars open longer until the outer parts dry. After a couple of weeks, you can sample your cannabis. The growth time is subjective, as some growers cure for up to 30 days.

Take a look at the cannabis gardening products we offer, and contact us today to find out more about what SoHum Living Soils® can do for your plants.

Cannabis Cultivation Basics

Cannabis Cultivation Basics

Growing Cannabis Indoors: The Beginner’s Guide to Success

growing cannabis indoors

Getting Started Growing Cannabis Indoors – What You’ll Need

These are a few necessary items to get the cannabis growing process started:

  • Feminized seeds or female seedlings (clones)
  • A dedicated area to grow your plants
  • Growing containers with adequate drainage
  • Enough SoHum living soil to fill containers
  • Lights-for your first grow, any lights will work. However, you’ll have drastically better results with units specifically designed for indoor growing (HID, LED, T5, or even high-output CFL’s will increase yields and quality)
  • Timers for lighting
  • Watering cans and spray bottles
  • Ventilation – For your first grow, 2-3 fans should be enough to provide adequate air exchange

Optional Supplies

  • Odor control solutions
  • CO2 generator
  • Trimmers or scissors for cropping
  • Screens, stakes, twine, wire or netting for training your plants to grow the way you want them to
  • Pest control as needed depending on what critters (if any) show up for the party
  • Magnifying glass/jewelers loupe/digital microscope/etc. to inspect pistils (more on this later)

You Won’t Need

  • Fertilizer – SoHum Living Soil provides all the nutrients your cannabis plants need throughout its life cycle.
  • pH testers/buffers/adjusters – SoHum Living Soil is naturally pH balanced for optimum nutrient uptake.


Step 1: Germinate Your Seeds

Using your preferred method, provide your seeds with a humid, dark environment in which they can sprout for the first time. DO NOT use any fertilizers or chemicals. Clean, de-chlorinated water is sufficient.

If you’re using seedlings, this step isn’t necessary. Just keep your seedlings humid and well-lit while you’re preparing your grow area.

Step 2: Set Up Your Grow Area

While seeds are germinating, you’ve got a few days to get your garden in order. This should be an area that can be kept clean and undisturbed for the duration of the grow. Make sure your “grow room” (tent, closet, basement, quiet corner…etc) is shielded from the sun so you can control lighting precisely.

Clean EVERYTHING that will be in your grow area carefully, including walls, floor, lights, and containers. Set up your lights and timers for the vegetative stage – 18 hours of light is a good standard until you’ve got more experience to experiment.

Step 3: Plant Your Seedlings

Sow your rooted seedlings, along with the medium they were germinated in, at least 2-4 inches into the living soil and gently pat the area until it’s level. Do not overwater at this point. Your soil should naturally be humid enough to attract roots to grow. One to two sprays with a water bottle should be enough to help your babies acclimate to their new home.

Steps 4-6: Water, Watch and Wait

Practice patience while your cannabis plants do their thing. During your first few crops, you’ll want to visit your garden regularly to make sure your super soil is humid, and your plants are showing no signs of pests or disease. Avoid the temptation to poke, prod or play with your plants too often – they may go as long as a week without needing anything and messing with them too often can stunt or stop their growth. Once you’re a more experienced grower, you’ll find ways to automate your garden, so you don’t need to spend much time with your plants at all these first few weeks.

Once your plants have taken root and are growing steadily, you’ll be able to train your plants to grow as you want them to. Here’s where SCROG, SOG, cropping, super cropping will come into play, but for beginners none of this is mandatory. It’s perfectly acceptable just to let nature take its course.

Step 7: Flower When Ready

When your plants reach the recommended age of maturity for their strain (check with your seed/seedling supplier for a guideline,) change the lighting schedule to 12 hours on/12 hours off. Continue to water only when the soil is dry. There is absolutely no need to add nutrients or fertilizer if you’re using SoHum living soil.

Your crop will start to smell pleasant but rather robust at this stage. If the aroma becomes too overwhelming, you can use odor eliminators, carbon filters, etc. at this point to keep it controlled.

Step 8: Time To Harvest!

When your crop produces dense, healthy flower and roughly 60% or more of the pistils have changed from white to dark red/brown, your grow cycle is complete. Cut your plants at the base and immediately hang them upside down in a dark area to begin the curing process. For more info on how to process your cannabis plants after harvest as well as more advanced tips on making your future crops exceptional, read what the experts have to say on our blog.

As you can see, growing cannabis with SoHum Living Soil is almost foolproof! Remember to monitor your plants while they are growing and water them as needed. Control pests, keep the lights on and the air circulating, and you’ll grow excellent cannabis every time. Growing cannabis indoors is made easy, if you just follow these few steps, and be patient.

Stock up SoHum Living Soil today and see just how easy growing your own cannabis indoors can be!


Your Cannabis Grow Checklist: Essentials for Growing Awesome Bud!

The Marijuana Grow Checklist

[vc_row][vc_column][vc_column_text]When you set out to grow the best marijuana, tools, gadgets, magic fertilizers and cropping tricks are fun. The best growers, however, have some key components on their cannabis grow checklist that are essential for producing high-quality cannabis flower. If you want your buds to be optimal, be sure to have these components in your grow room:

Quality Genetics

You get out what you put in! The quality of the seeds or cuttings you use to cultivate your cannabis is the most important factor to determine the quality of your finished product. The best genetics are more likely to produce the strongest plants and the best harvest possible. Your cannabis crop will be more consistent, more resistant to disease, and the end product will be a little easier to predict.

Strong Lighting

Whether you’re using the sun or artificial lighting, your plants will need a healthy amount of light to fuel photosynthesis. Spend plenty of time researching and designing your lighting plan to provide the brightness, timing, and spectrum of light you’ll need to grow healthy marijuana plants.

Nutritious Soil

The best lighting system in the world is no better than a flashlight if your roots aren’t in the right growing medium. Your soil should provide a natural balance of nutrients, moisture retention, drainage, and strong structure for healthy root growth. Modern growers like to customize their soils using chemical fertilizers, pH buffers, and artificial substrates designed to force plants to harvest quickly at the expense of quality. Fortunately, there are natural soils for sale such as SoHum Living Soils® that duplicate the same growing conditions provided by Mother Earth. Natural microbes work to break down organic matter, converting it into food for roots the way that nature intended. The natural byproduct is a high quality, nutritious substrate that is naturally pH neutral and maintains moisture perfectly. SoHum Living Soils® is ready to go without mixing or measuring. Just add water, and you’ve got the perfect growing medium for high-quality cannabis.

Clean Water

For the best quality marijuana harvest, water your plants regularly with clean, pH-balanced water. You don’t necessarily need to distill your water, but avoid hard water with a high mineral or chemical content. If you’re feeding your plants by hand, make sure your containers are clean. Automatic watering systems should be carefully maintained, and timers should be regularly calibrated.


If you’re using a high-quality living soil like SoHum Living Soils®, water acidity isn’t as much of a factor since the soil contains a natural pH buffer. SoHum Living Soils® also has the advantage of providing roots with the ideal drainage and retention.

Patience!

Good cannabis product takes time. Beginning growers tend to tinker with their crops too frequently; touching, pinching, spraying, bending and cropping simply out of boredom. And some novices try to force their plants to harvest as quickly as possible so they can begin a new crop. If you’re not able to be patient, you won’t be able to grow high-quality marijuana.Anybody can grow cannabis, but time, dedication and the highest quality growing conditions set the best growers apart. When you’re ready to take your grow operation to the next level, learn how to become an expert at growing cannabis from the professionals at SoHum Living Soils®.

How to Spot a Nutrient Deficiency in Your Cannabis Plant

How to Spot a Nutrient Deficiency in Your Cannabis Plant

Using a living soil like SoHum as a medium to grow your cannabis plants will increase your yield and will grow happy, healthy plants. That’s because SoHum Living Soils delivers the necessary nutrients specifically required for optimal results in growing cannabis.

If you’ve never used living soil to grow your cannabis, chances are you’ve run into many of the telltale symptoms of nutrient deficiency. Nutrient deficiency occurs when a plant isn’t receiving the proper micronutrients and macronutrients to fuel its cells and facilitate photosynthesis, resulting in sickly and unhealthy plants.

There are often early warning signs of a deficiency and, if it’s caught early enough, a plant can repair itself and thrive. Often growers will overlook the possibility of their crop being malnourished and, instead, rush to futile activities like foliar feeding the affected area, adding an expensive CO2 generator, or spraying their crops with pesticides. In the meantime, their plants are starving from the inside, which could lead to stunted growth, poor potency and, in the worst cases, the loss of an entire crop.

SoHum has spent countless years researching how to grow cannabis including how to spot symptoms of malnourishment. We want to share what we’ve learned about how to diagnose cannabis nutrient deficiencies. To be clear, this is a list of possible symptoms of specific nutrient deficiencies; be sure to rule out other possible maladies before changing your cannabis plants’ diet. If soil PH, excessive temperatures, nutrient burn, pests, under/overwatering, or improper lighting techniques can all be eliminated as culprits, it may be time to change your growing medium to a living soil.

Macronutrients

How to Spot a Nutrient Deficiency in Your Cannabis Plant

Nitrogen (N)

The first of the NPK macronutrient trilogy, nitrogen is essential throughout the lifecycle of the plant, and especially during the vegetative stage. Plants that are lacking in nitrogen will have leaves that lighten as they mature, eventually turning yellow. This is especially noticeable at the base of the plant. As it becomes more severe, the yellowing will spread, and the leaves will eventually curl and drop. Yellowing is to be expected toward the end of the flowering stage, but early nitrogen deficiency will cause bud sites to shrink and flowers to begin forming early, resulting in horrible yields.

Phosphorous (P)

Phosphorous is the second essential macronutrient and is necessary for photosynthesis and releasing the energy stored in carbohydrates. A lack of phosphorous in a plant is first noticeable by a purpling of the leaf stems on older leaves. Then, the leaves themselves take on a bluish green color, drastically slow in growth, and develop copper colored spots on new leaves.

Potassium (K)

The third and final macronutrient, potassium is essential in the growth of the plant. All aspects of growth require potassium, from the movements of sugars and carbohydrates to cellular division, transpiration, root growth, and water uptake. Though the least lethal deficiency to the plant, potassium is necessary to prevent sickly cannabis that produces no buds. Potassium deficiency causes the older, higher leaves on the plant to turn brown or yellow with brown edges. If left unchecked, stems will weaken, and the plant will stretch.


Micronutrients

Micronutrients Super Soil for Growing

Calcium (Ca)

Leaves take on a purple or dark blue hue. Leaf surfaces become increasingly shiny, and tips or edges turn yellow. Buds may not ripen in the flowering stage.

Magnesium (Mg)

Outer edges and veins fade to light green or yellow.

Sulfur (S)

Young leaves turn lime green, then yellow. Leaf veins will turn yellow and, finally, the leaf becomes dry and brittle. If allowed to continue through flowering, flowers will grow slowly and weakly and finished product will be of very low potency.


Copper (Cu)

Slow twisting and wilting of new growth. Dead spots appear on leaf margins.

Iron (Fe)

New leaves will grow as a yellow color and will never darken.

Manganese (Mn)

Interveinal chlorosis (yellowing between the veins on the leaves) and necrotic spots showing on all new growth, gradually spreading to older leaves.

Molybdenum (Mo)

Older leaves develop interveinal chlorosis, turn yellow and discolor at the edges. Leaves eventually curl up, twist and die.

Zinc (Zn)

Veins turn yellow, and leaf tips turn brown and die.[/vc_column_text][/vc_column][/vc_row][vc_row][vc_column][vc_column_text]SoHum Living Soil is an expert on growing cannabis, and we welcome you to learn from our experience. Check out our website for more tips and tricks on how to grow an optimal yield and get your plant more potent than ever before. Or simply contact us with questions about your crop or our products. Finally, feel free to stop by our store so you can talk shop with our knowledgeable staff. We love growing cannabis and are excited to share our knowledge of the subject with you!


A Guide to the Best Cannabis Nutrients

Cannabis Cultivation

Knowing the best growing medium for cannabis plants is important for cultivating. Getting the most from your plants requires some knowledge of the specific nutrients cannabis needs to grow.

The following nutrients are found in SoHum Living Soils, a fully amended potting mix, inspired by True Living Organics.

Feather Meal

Feather meal is a natural, organic fertilizer. It is perfect for plants that require a lot of nitrogen to thrive, as it rapidly releases nitrogen early on to stimulate growth. Feather meal also has a slow release quality to it, leading to healthy late-stage growth. Nitrogen helps to stimulate photosynthesis, leading to strong leaf growth and a healthy shade normally associated with high-quality products.

Langbeinite

Langbeinite is a unique type of crystalline. It is only found in a few locations across the globe, with the main source coming from New Mexico. Each batch is cleaned before sold for commercial use. We ensure that we only use the best nutrients for growing cannabis, so you can trust that all langbeinite used in our soil has been thoroughly prepared first. Langbeinite is highly effective, as only a few granules of the substance can lead to high nutrient levels in the soil.

Kelp

Kelp has a ton of nutrients and minerals that make it an ideal addition to any living soil. Dried kelp has a high concentration of potassium, along with 70 other minerals, amino acids, and other elements important for plant growth. It also contains mannitol, which helps plant cells process sugar faster and easier, stimulating growth. We only use high-quality Norwegian Kelp in our soil to give you the best possible results.

Crab Meal

Crab meal helps to make your soil incredibly healthy and is another one of the greatest nutrients for growing cannabis in soil. It has chitin, which contains nitrogen, calcium, and magnesium. Taken together, these elements promote healthy plant growth over an extended period. If you are growing your plants outdoors, crab meal ensures that ants, grubs, slugs, and snails stay away from your crop. This nutrient has also been shown to ward off weeds.

Bone Meal

Bone meal is an organic fertilizer that is high in phosphorus, proteins, and calcium. These minerals are slowly released over time, making bone meal an excellent way to promote healthy growth over the lifetime of the plant. Phosphorus is especially important to plants when they are rooting and just before they begin to flower.

Alfalfa Meal

As with other nutrients, alfalfa meal contains nitrogen, phosphorus, and potassium. It also contains magnesium, sulfur, and triacontanol. Triacontanol is one of the best growth hormones for plants. It’s perfect for indoor and outdoor growers, as only a small amount is needed to fully enrich the soil. The alfalfa meal added to SoHum Living Soil is properly fermented and just the right amount.

Perlite

Derived from obsidian, perlite is mined and subsequently heated to create small, round balls. It is primarily made up of silicon and lacks the same type of nutritional content as other key ingredients. However, it helps stimulate root growth by encouraging water retention in the roots. Perlite is ideal for use with indoor and outdoor gardens and is perfect for those who are growing in small spaces.

Peat Moss

Peat moss is probably the best-known soil nutrient, as it is a staple across North America. It is ideal for plant growth as it does not have any disease or insect development. Peat moss can hold more than 20 times its weight in water, which makes it perfect for those wanting to start growing seeds

Worm castings

Worm castings are earthworm waste, containing a lot of rich soil. This component is rich in calcium, which is essential for your plant’s healthy growth. These castings are great for indoor and outdoor gardeners, as they help with nutrient absorption and prevent pH imbalances in the soil.

Whether you are growing cannabis professionally or for personal use, you need to be sure that the soil you choose meets all those nutritional requirements. Using SoHum Living Soils is the perfect solution. Our soil has been scientifically engineered to include every nutritional requirement your cannabis plants need to thrive. SoHum Living Soil is suitable for its entire life cycle, taking a lot of guesswork out of cultivating.

We know that you do not want to be restricted to your growth location, so our soil is suitable for everything from lawns and gardens to indoor use in pots or other planting containers and from vegetables to cannabis.
Visit us at our Denver location, or online at SoHum Living Soils and let’s grow together![/vc_column_text][/vc_column][/vc_row]

The Cannabis Cultivation Timeline: Stages of Development

The Cannabis Cultivation Timeline Stages of Development

First-time growers often have the same question: how long does it take for a cannabis plant to grow from a seed? Knowing the cannabis cultivation timeline is important, as it indicates when your plant is ready to be harvested. You can also use this information to learn about the growing process and signs of healthy and non-healthy growing practices.

If you want to promote strong, healthy plants with an improved yield, you should start the whole growing process with living soil. At SoHum Living Soils, we have taken all the guesswork out of growing plants by pre-amending SoHum with all the macro and micro-nutrients your plants need.

Cannabis Plants: The Stages of Development

Germination

The first of the four general stages of cannabis development is the germination stage. While the germination process typically takes anywhere from one to seven days, the entire germination stage lasts about one to two weeks. It can take time for the seed to become receptive to water. Ideally, you should use seeds that are hard, dry, and brown. Lighter colored seeds take longer to germinate.

You know your seed is ready to be transported to its growing place when a tap root appears, and it looks like it has popped. Make sure you plant it with the taproot facing down. As the plant germinates, you should see two round cotyledon leaves emerging from the stem to help stimulate photosynthesis. Once the roots are fully formed, fan leaves begin to grow, and your plant is now in its next stage of development.

Seedling

While your plant is in the seedling stage, it needs approximately 18 to 24 hours of sunlight a day. The seedling phase lasts for approximately two to three weeks, during which time traditional cannabis leaves begin to grow. At the beginning of this stage, the leaves have only one finger, far from the five to seven most marijuana leaves should possess. As the plant progresses through this stage, each leaf acquires more fingers. Once every leaf has five or more fingers, the plant graduates to its next stage.

During this stage, pay attention to the plant’s growth, which should be short and dense with vegetation. If your plant is growing tall, it needs more sunlight. You may want to increase its exposure to appropriate lighting during this stage. Your leaves should all be a very healthy green color. Remember that your plants are particularly susceptible to mold and disease during the seedling phase. You can minimize this risk by removing excess moisture and keeping the nearby environment as clean as possible.

Vegetative

The vegetative stage can last anywhere from two to eight weeks. During this time, your plant needs 13 to 24 hours of sunlight per day. You should notice that your plant’s growth increases dramatically. You should transport it to a larger growing medium at the beginning of the phase, to help encourage the roots to spread. Most growers also use this time to start the topping or training process. At this stage, you should also notice a difference in the type of plants. Indica plants are dense and short, while Sativa plants are taller and less dense.

During this stage, you need to increase the amount of water you provide to your plants. As your plant progresses through each stage, you should water it further away from the stalk. For example, you should water a seedling close to the stalk, as the roots are still small. When watering a plant in its vegetative stage, you should water further away, giving the tips of the roots increased access.

Flowering

Flowering is the final stage in your plant’s development. It takes about six to eight weeks, during which time you need to expose the plant to 12 hours of sunlight per day. Be careful to avoid increased light exposure, as it can inhibit further growth. This stage involves pruning and ensuring it is stalked and trellised.

After the buds are completely mature, you can begin harvesting. The best way to tell if your plant is ready is to examine its trichomes. You can do this by using a microscope. Your plant is ready if the trichomes are amber.

The team at Sohum Living Soils is here to answer your questions, whether you are a novice or an expert cultivator. visit us online at sohumsoils.com to find out more about healthy cannabis growing, including best practices and other recommended techniques. Contact us online, by phone, or stop by our Denver location.