Topping Cannabis Plants

when to top cannabis

When to Top Cannabis Plants

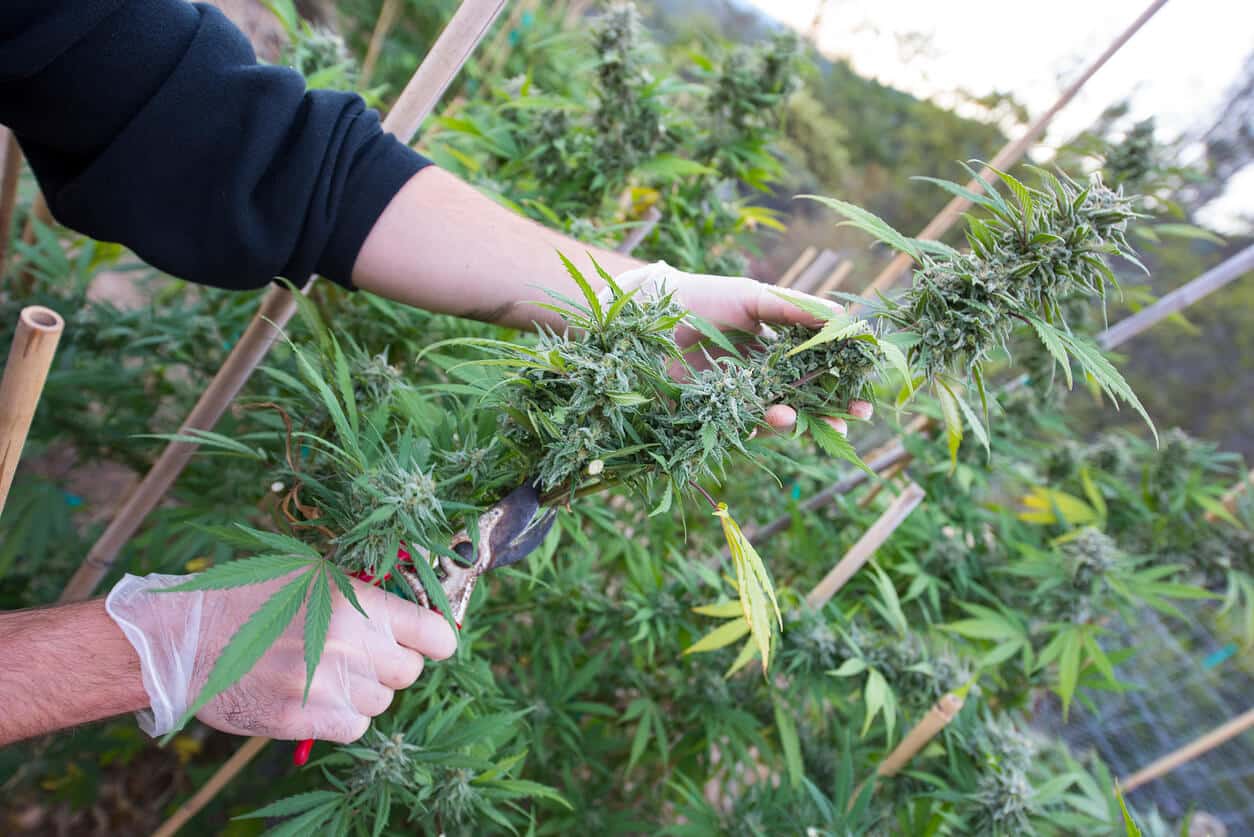
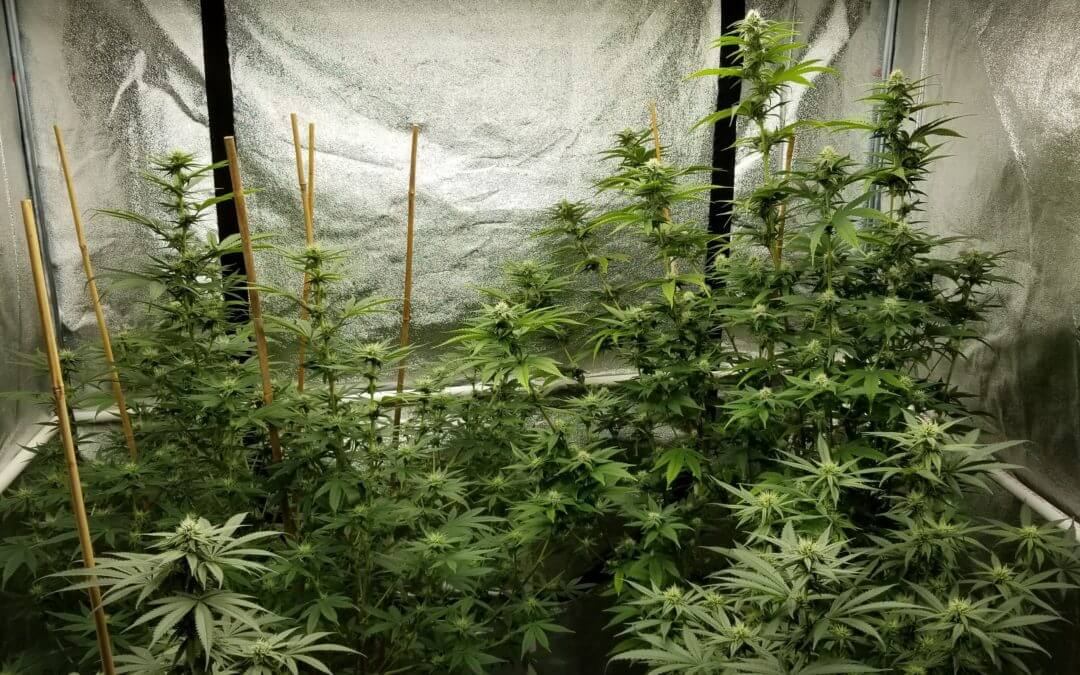
Whether you grow indoors or outdoors topping your cannabis plants helps to produce a bigger and better yield, which is every grower’s primary goal. The first thing to understand is that topping is an exact cut at the node, and while that sounds easy, the timing of topping is critical. Topping forces the plant to grow laterally rather than vertically, but when to do so depends on soil health, plant health, lighting, size and age of the plant, and the growth goals.

If you are new to cannabis cultivation, topping cannabis plants is a vital step to maximize the overall quality of the yield. It is a tool that helps to control the overall shape of the plant – by redirecting the growing tendency from vertical to lateral.

The effect is that the supporting branches develop a thicker and stronger cola. Topping,  however, is not the only factor that goes into producing quality and sizable yields. Other factors include soil health, watering, and light.


Topping Cannabis Plants – When is the Best Time?

All plants have stages to their life cycle. So, whether we are discussing an annual plant or a perennial plant, understanding the plant’s lifecycle is essential, especially if you want to control the results of each stage of growth. The key to managing a plant during each cycle has a lot to do with how much light the plant receives.

The vegetative cycle, for example, can last from two weeks to six months. That is a critical consideration because topping a cannabis plant is a traumatic experience for the plant. Therefore you want to top plants when that plant is at its healthiest – giving it additional energy into changing from growing vertically into growing laterally.

That also means that soil health needs to be ideal as topping increases the growing demands for the plant. The first thing you need to understand about topping is that the plant will need additional nitrogen to fuel the development of additional cola.

Healthy – What does that mean? The short answer here is actively growing. However, understand that plant health has a lot to do with watering cycles, light, and soil. Lush healthy plants require all three of these ingredients to produce optimum yield.


The Cannabis Life Cycle

Germination – generally 2-3 days, depending upon species type, mutations, etc. This cycle can also be as short as eight hours if growing conditions are optimum – good soil, proper watering.

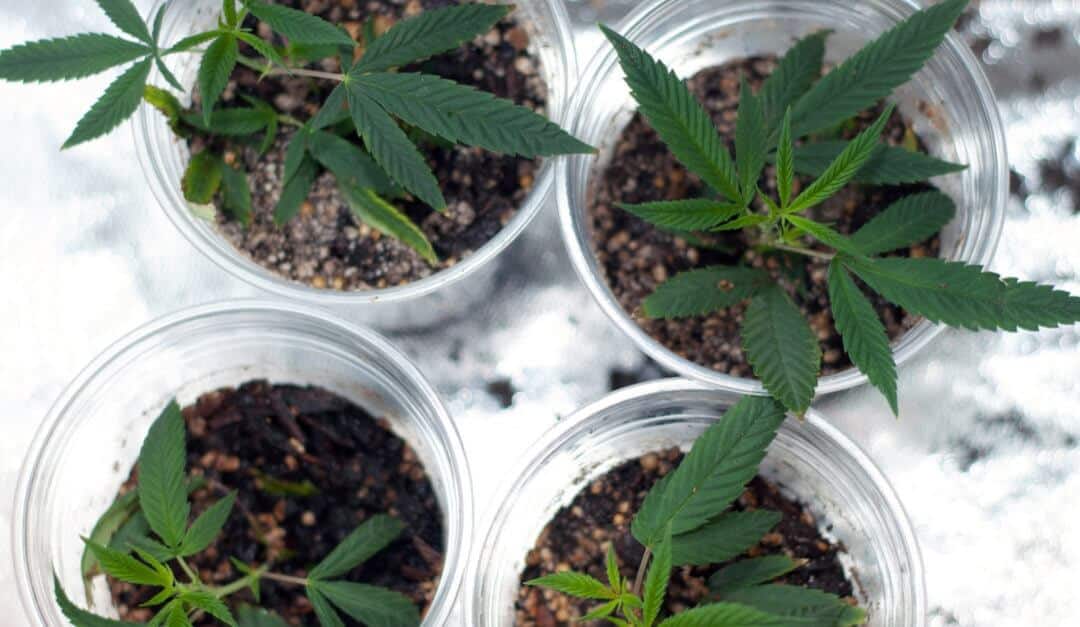
Seedling – generally 1-2 weeks (though can be stretched longer).

Vegetative – generally 2-6 weeks, based on pot size.

Read more on tips for growing Cannabis if you’re just getting started.


The Vegetative Stage and Topping Marijuana

When to top a cannabis plant is a big question and it does not always have a perfect answer. This is because species vary, growing environments vary, and of course, there could be mutations – planned or accidental. Those factors all weigh in to determine “when” is the best time to top cannabis. However, the topping is also planned, and you manage a lot of what your plants do by controlling soil, water, and light.

You don’t want to top a cannabis plant too soon. The plant must be able to handle the pruning process. A cannabis seedling can range from 1-2 weeks old, and you would not want to top the plant at week three. It would likely not survive, even though at week three, it should be in the vegetative stage of its development.


Counting Nodes

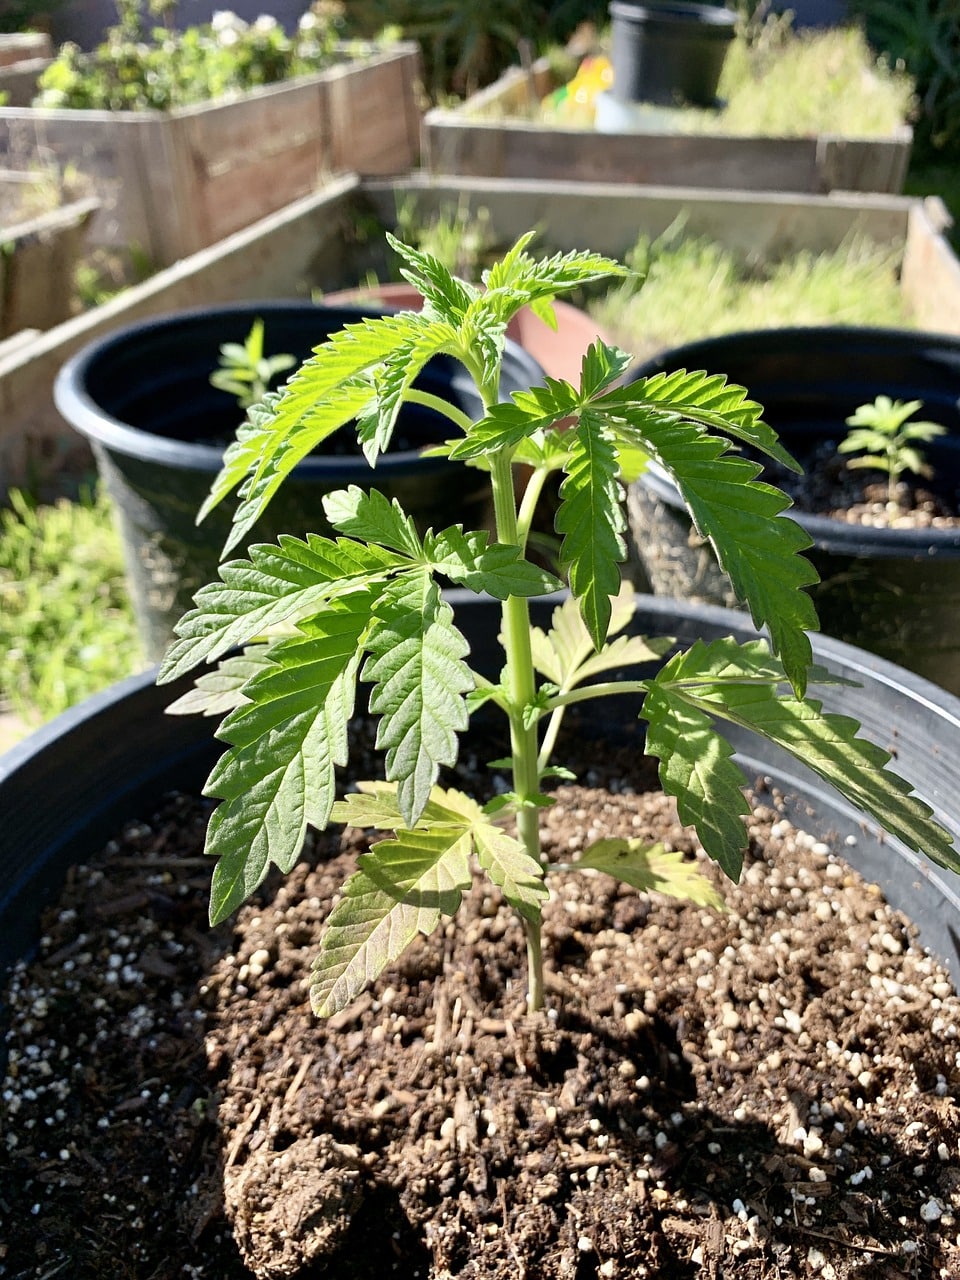
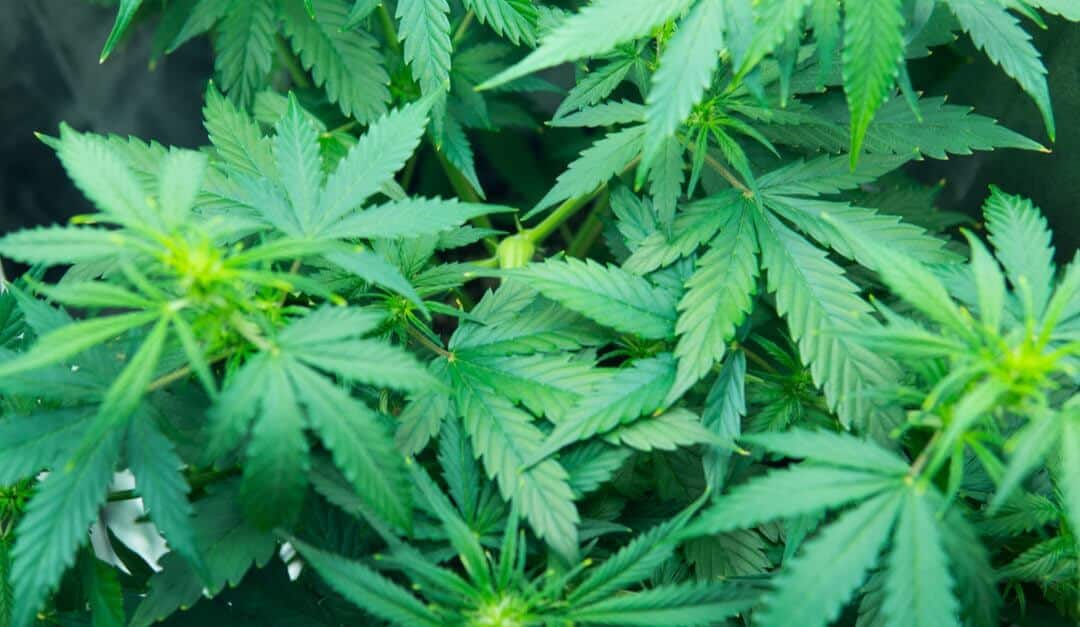
A good rule of thumb is to count the nodes. A node is a junction on the stem where branches grow from the main stem, and cannabis plants tend to node in pairs. The spacing between nodes is called the “internode.” The internode is the stem that grows from one node to the next. Indica plants tend to have very short internodes, as these plants are short and squat. Sativa plants, which are taller, have a longer internode.  For topping cannabis, you want to have at least four nodes and preferably six-eight nodes. This is a general rule. Topping at four nodes is riskier than topping at six- to- eight nodes as plant health improves as the plant grows.


Lighting

Counting the Nodes is one rule of thumb, but also consider topping when you change the plants light ratio. The shorter the light cycle, the closer the plant moves toward flowering or seeding. You certainly do not want to top a cannabis plant during the flowering stage. By controlling the light, you can extend the vegetative stage of growth. Generally, when the lighting gets to 12 hours of sunlight and 12 hours of darkness, the plant goes into flowering mode, as that signals the plant that the season is changing.


What Physically Happens When You Top a Cannabis Plant?

In the vegetative stage, the plant is putting on height and pouring energy into the main stem. When you top a cannabis plant, the energy that it feeds into growth immediately shifts into healing, and the plant goes into recovery mode. Plants have a competitive need for resources,  even though these plants are grown in a controlled environment, you are still dealing with the genetics of wild plants. It is, in short, a battle for sunlight. When you top at the terminal bud, the lower node suddenly has access to light and from that spot emerge additional cola. You have first stopped the upward momentum of the plant which is now forced to grow laterally.

1. The plant’s focus changes from growing a single cola into producing multiple colas. This occurs because the nodes beneath the topping point now have access to plenty of light, especially with indoor growing technology. You can control this through quality soil and additional water – two ingredients that cannabis needs to produce robust cola.

2. The plant immediately goes into a recovery mode. Having the top portion of the terminal bud removed is traumatic. Recovery means growth so to compensate for the loss, the plant begins to grow and as it does, more cola emerges from the node just below the topping point.


Considerations When Topping Marijuana Plants

The first thing to look at is plant health. A plant that is not getting enough light might have eight nodes but not be in excellent shape. Plants need to be robust, the main stem needs to be developing and the overall growth of the plant is even.

Soil Health is another consideration. As mentioned, the topping is stressful for the plant which is why:

1) plant health needs to be optimal before topping, and

2) soil health needs to be optimal after topping. The plant will need more nutrients to spur lateral growth. Growing uses energy, so the plant must have access to good soil energy, which in this case is nitrogen.


Boosting Plant Growth and Health

You can do yourself and your garden a favor by starting off with good quality soil and providing adequate water throughout the growing cycle. Also, plan each step and understand that the differences among species of cannabis will require different timing for topping.

This is not just indica vs. sativa. The requirements will vary from one strain of cannabis to the next. It is helpful to keep a growing journal so that you can build wisdom as you grow.

Start growing cannabis the easy way

Quality super soil that yields high results with minimal effort.

Cultivation Requirements for Cannabis Plant Growth

Cultivation Requirements for Plant Growth


A growth medium is one of the most important elements of health for any plant. The classic growth medium, of course, is outdoor soil.

Over the years, growers have experimented with a wide range of solid, semi-solid, and liquid growth media, each with unique traits. The right growth medium is essential to ensuring that the plant steadily receives all the nutrients it needs.


1. Warmth

No matter where they are naturally found, all plants require sufficient warmth to thrive. For all living things, biological activity decreases as temperatures decrease. Plus, cold air simply has less life-giving moisture than warmer air.


With sufficient warmth, cells throughout the plant are empowered to engage fully in photosynthesis, converting heat from sunlight into energy.


2. Sufficient Light

Plants are unique in that light is essential for them throughout their entire lifespan. As sunlight reaches a plant, the green pigment called chlorophyll absorbs it.

This generates the energy to meet systemic demands for photosynthesis, where carbon dioxide is

altered into a natural food source. The process also results in the oxygen we all breathe.


3. Enough Water

Water is the other key element in photosynthesis. Without it, plants wither and die. Unlike light and air, water must usually be absorbed through the root system.

Roots carry the water to all of the leaves, flowers, and other components of the plant.

Along with carbon dioxide, water is the fuel transformed by chemical action into glucose, sugar the plant uses for growth and repair.


4. Proper Nutrients

All plants require certain essential nutrients. Some flourish with a different ratio of elements than others, but all of them need the same basic building blocks.

For example, all fertilizers must contain some amount of nitrogen, phosphorous, and potassium to be effective. This is the key to the best possible blend of super soil: Delivering the right nutrients in the right combinations through natural, highly bioavailable sources.

If you are on the hunt for organic super soil for sale, you needn’t look any further. Our living soil for sale is completely organic, developed by and for growers. It can be used with ease in both indoor and outdoor growing environments – and it’s ideal for demanding crops throughout the entire annual life cycle.

Start growing cannabis the easy way

Quality super soil that yields high results with minimal effort.

Nutrient Deficiency in Cannabis Plants: Expert Guide

Nutrient Deficiencies in Cannabis plants will destroy their chance of growing into large, blooming buds. Growers use nutrients to grow big, beautiful, sticky buds. Whether you’re growing soil or hydroponic, plants need precise ratios and levels of properly configured nutrients or amendments to ensure your crop meets expectations. However, the mishandling and improper balance of them can have a negative impact on your grow.

Your garden will suffer when plants are given the wrong kind of nutrients, when they are fed nutrients at the wrong time, when they are fed too much of a given nutrient, or when they have not had enough of a nutrient. Here are some common problems associated with nutrient deficiency:

Nitrogen Deficiency in Cannabis Plants

Cannabis grows fast and requires generous amount of nitrogen as it matures. Nitrogen is part of a group of three primary nutrients for plant growth; the other two being phosphorus and potassium (more on this later). This nutrient can be found mainly in the leaves and shoot tips of the plant. Nitrogen is responsible for many of the healthy developments of the plant; including the production of enzymes, proteins and chlorophyll. Chlorophyll is the component responsible for the green color of leaves, seeing leaves turn yellow is a telltale sign of Nitrogen deficiency

Causes:

  • Pests
  • Undersized containers
  • Poor Soil Quality
  • pH Imbalance
  • Lack of fertilizing

Symptoms:

The lower leaves yellow between the veins. Eventually, the whole leaf will become yellow. It will wither and die and plant growth will become inhibited.

The plants will stay short and underdeveloped if nitrogen deficiency is severe in the growth phase.

During the flower stage, nitrogen deficiency can lead to a decrease in your crop’s yield. Please keep in mind, during the last three weeks of flowering, healthy plants will not require nitrogen.

Yellowing and the shedding of leaves is a natural part of the final weeks of flowering.


Phosphorus Deficiency in Cannabis Plants

Phosphorus is required at all stages of plant development, especially during root and bud growth. This nutrient is necessary component of enzymes and proteins.

There are a lot of chemicals that contain high levels of phosphorus and in doing so, supposedly increase bud production.

This results in plants having extremely high dosages of phosphorus, making them overfed.

Causes:

  • Poor soil quality; loamy or waterlogged soil
  • A pH imbalance
  • Lack of fertilizing
  • Over-Fertilization

Symptoms:

In younger plants, a phosphorus deficiency will slow growth. This underdevelopment will lead to a poor root zone and small bluish-green leaves.

Plants in the flowering stage of development will have leaves turn reddish-purple. Bud growth and yield will be low if a phosphorus deficiency sets in during early to mid-flowering. Further, plants will have an overall lack of vigor and resistance to pests.


Potassium Deficiency in Cannabis Plants

Potassium should be made available to the plant through out the entire life cycle of the plant. Potassium is important for the generation of energy, as well as improving plant and root growth. As such, it plays an important part in regulating transpiration, the manufacture of chlorophyll, starches and sugars.

Causes:

  • Poor soil quality
  • Over-fertilization

Symptoms:

A potassium deficiency is similar to a nitrogen deficiency; the leaf deterioration shares a resemblance but one differentiation is the rust-colored spots. Potassium deficiency may turn healthy leaves brown; this is due to a disruption in transpiration. In severe cases, stems will become brittle. This deficiency is most common in flower phase and will dramatically impact yields.


Magnesium Deficiency in Cannabis Plants

This is one of the most common nutrient deficiencies in indoor cultivation facilities. This occurs because of factors that can inhibit the uptake or availability of Magnesium.

The purpose of magnesium is to encourage strong, healthy veins and stimulus of the creation of leaves. Also, it plays an important role in breaking down enzymes and producing chlorophyll.

Causes

  • Acidic soil
  • Over-fertilization
  • High calcium content

Symptoms

First indications of this problem are similar to nitrogen deficiency, the lower to middle leaves yellow between the veins. Eventually, the entire leaves will become yellow.

The telltale sign of Magnesium deficiency are the rusty spots that appear dotted throughout the leaves. This will distinguish Mg deficiency from lack of nitrogen.

Also, leaf edges appear necrotic and curl up. Some leaves develop a whitish tinge.


Start growing cannabis the easy way

Quality super soil that yields high results with minimal effort.

How Much Water Does It Take to Grow Cannabis?

How much water do your cannabis plants need?

One of the challenges of growing cannabis indoors is knowing how much water to feed your plants. In nature, plants have the advantage of natural rainfall and drainage and only need to be watered during drought conditions.

Watering your indoor plants too little or too much will stunt production, and water waste can drastically increase your overhead. So how do you get it right?


How Much Water Should You Add to Cannabis Plants?

A good standard to work with is one gallon of water per day for each pound of processed flower you expect to harvest from each plant. The finished weight will obviously change according to how long you allow your plants to veg before forcing flower, so adjust your water per plant accordingly.

This ratio was determined by the Emerald Growers Association and the Mendocino Cannabis Policy Council after polling numerous cannabis farmers about their water usage.


How Much Water Does It Take To Produce a Standard Eighth Of Cannabis?

1.875 total gallons per 1/8th of usable cannabis.

Use this figure when calculating your overhead costs if you’re adhering to the 1:1 ratio of one gallon per day per pound of processed flower.


How Often Should You Water Your Cannabis Plants?

Your watering schedule will vary according to the temperature of your grow area as well as the strain, health, and size of your plants. When determining a watering schedule, observe your plants every day.

Do the stalks look rigid or weak?

Do the leaves look colorful and vibrnt or do they look droopy and pale?

Also, consider utilizing gravity-fed watering systems that allow plants to take water in from the bottom u, taking the guesswork out of the equation.


How Do I Water Cannabis More Efficiently?

By following the below points, you’ll increase your chances of having success with growing cannabis:

• Use SoHum Living Soils® for best moisture retention and drainage
• Install a drip line system for maximum water control
• If you find yourself using more than the 1:1 ratio, consider moving your plants to larger pots to retain water longer
• Monitor your plants daily; as cannabis plants are living beings and can be unpredictable
• Utilize gravity fed watering systems or bottom watering containers
It is imperative to calculate water costs when growing cannabis. If a grower is not careful, the financial and environmental impacts of using too much water can be extreme.

At SoHum Living Soils®, our team consists of experts on growing cannabis, and our website features many articles on best practices.

For a more personal experience, contact us with questions or visit our store in Denver to speak with our knowledgeable team about your cultivation questions.

Growing Cannabis: 10 Tips for Success with Growing Your Own Weed

growing cannabis

Growing Cannabis & Where to Start

Ever thought about growing your own cannabis? It’s a great hobby akin to gardening. But, instead of being left with a bunch of tomatoes, you’ll yield a crop that’s a lot more fun.

It doesn’t matter if you don’t have a green thumb.

Once you learn the proper steps, you’ll realize it’s easier to do than you think. With some patience and THC–sorry, TLC–your pot plants will be thriving in no time.

You’ll find a sense of pride in growing your own pot. Plus, you can cut out the middle man and get high on your own supply.

If any of this piques your interest that you must read these ten tips for growing cannabis. You’ll be sprouting buds in no time.


1. The Better the Cannabis Soil, the Better the Cannabis

It’s no accident we listed this tip at the top of our list. Nothing will affect the quality of your cannabis more than the quality of the soil you choose to grow it in.

You feed children nutritious food to help them grow, right? Well, your cannabis child needs nutritious food too.

The best thing for your plant is living soil.

This specialty soil contains all the nutrients, good bacterias, and friendly fungus your cannabis needs. Growing in living soil ensures that your plant meets its full genetic potential.


2. Say No to Clones

Once you’ve chosen your soil, you need to figure out what to put in it. You have two options: clone plants or seeds.

A clone is cut from a previously grown plant. It would seem like starting with an already developed plant would be a nice head start.

In fact, a clone can actually set you back.

Not only are they difficult to transplant, but they also come with a lot of baggage. Clones carry weaknesses and diseases from their mother plants. You could be setting yourself up for failure.

Growing from seeds may seem intimidating. But you’ll get a stronger, more fertile plant in the long run.


4. It’s All About Location, Location, Location

Soil? Check. Seeds? Check. Now, it’s time to pick an area to put them all.

Cannabis is a very picky plant. Its growing location is paramount to its success. Ideally, you live in a location with eighteen hours of light, slight humidity, and gentle breezes.

If you don’t live in one of those idyllic climates, don’t fret! You can replicate it inside.

The advantage to indoor growing is that you will have complete control of your environment. You’ll need lights, humidifiers, fans, and a closed-off spot in your home.

You can never fully replicate the value of the sun. But, this small, controlled set up is ideal for first-time growers.


5. Be Afraid of the Dark

Like all plants, cannabis needs light to survive. Do you remember Photosynthesis from high school bio? This process gives plants the energy it needs to grow by absorbing energy from the sun.

Your indoor grow lamps will be the sun providing energy for your starving cannabis. The best bulbs are high output fluorescents. They should be positioned no more than four inches away from the sprouting plant.

You also need to replicate nighttime by shutting the lamps off for approximately six hours a day. This will give your plants the rest they need to grow big and strong.


6. Don’t Over-Water When Growing Cannabis!

After nutrients and light, water completes a plant’s healthy diet. But like all things, moderation is key.

Your plant will tell you if it’s being overwatered. Its leaves curl up away from the pot when they’ve had enough.

Too much water will drown your roots and your plant will stop growing. Since there’s no way to give roots CPR, it’s best to under-water rather than over.


8. If You’re Comfortable, Your Cannabis is Comfortable

Your plant is just like you. It prefers a nice temperature of around 74 degrees Fahrenheit. If you’re too hot or too cold, then you can be certain your plant is too.

This is very important to be aware of. While you might just feel uncomfortable, your plant could be at risk of death.

To avoid this, place a thermometer in your growing space and checking it regularly.


7. Don’t Be Your Plant’s Only Fan

Cannabis plants need airflow to prosper. If you’re growing indoors, you most likely don’t have a moderate breeze flowing through your home.

That’s why you need fans. Stagnant air can cause unwanted mold and bacteria to grow on your cannabis. Fans, used together with exhaust systems, can ensure quality flow.

Both you and your plant will breath better with adequate air circulation.


9. Be Prudent With Your Pruning

If all the above conditions are met, your cannabis will be prospering in no time. But, there’s still much work to be done.

To get the biggest growth possible, you need to diligently prune your plant. That means cutting off the plant’s lower nodes. Lower nodes won’t receive enough light. By removing them, you’re saving energy for the rest of your plant.


10. Dry and Cure the Buds

Drying and curing your buds is probably the most important part of this whole process. Any moisture left on your buds could result in mold destroying your harvest.

To dry them, you need to place your buds on a rack in a temperature-controlled space with good airflow. Curing is done by storing the dried buds in mason jars.

The more diligent you are with your drying and curing, the better results you’ll have with your cannabis.


Growing Cannabis is Easy with These 10 Tips

Growing cannabis takes commitment and patience. But, if you’re willing to learn and put in the effort, anyone can do it.

Interested in trying this hobby out yourself? Then get started on the right foot by providing your plants with the best soil possible. Check out our living soil now and get on your way to growing!

Start growing cannabis the easy way

Quality super soil that yields high results with minimal effort.

How to Grow Cannabis – Home Growing 101

Looking to Grow Cannabis at Home?

Growing at home for the first time can be an exhilarating experience, especially when your state says it’s okay for you to do so. The legalization of medical and adult-use cannabis in certain states allows residents to exercise their right to grow cannabis in their own closets, basements, spare bedrooms, and creative spaces. Before you head over to purchase your dream grow kit, be aware there are many variables that can make or break a successful grow cycle.

Landlords

The State of Oklahoma allows you to cultivate cannabis at home with just a few important rules. Be sure to follow them! You must ask permission from your landlord before you starting your grow. If you rent or lease, your landlord can deny you the right to grow on their property. Don’t spend thousands of dollars on a cultivation setup only to find out you don’t have permission. You might be surprised to know that many landlords openly rent to growers—but they expect and deserve full disclosure.

HVAC and Ventilation

Now that your landlord has agreed to let you start your personal home grow, you’ll want to research the best temperature and humidity that your plants will need through each phase of their grow cycle. Cannabis loves high-intensity light, heat, and water, but you’ll want to ventilate the air to control the temperature and humidity. This will prevent mold and mildew from growing on your plants and mildew contamination inside your home. The correct environmental controls will prevent you from costly repairs or heated discussions with your landlord. Consult your local grow shop for assistance, read books and magazines, and search YouTube for great instructional videos.

Cultivating cannabis will ‘stink out’ the entire neighborhood. Trust me. I know. Don’t be that grower. Use charcoal filters, PCO technology (Photo Catalytic Oxidation), ozone generators, or a combination of processes to eliminate or mask the smell. If neighbors become upset with the odor, local authorities will be called, and harassment will ensue even though you are legally exercising your rights. It’s better not to invite trouble. Be a good neighbor and don’t draw attention to yourself.

Photographer: Jake Baum Grower: Kris “Sparky” Molskness

Growing Styles

Hydroponics, aeroponics, geoponics? Where do you start? Shopping at your local grow shop can be overwhelming for the budding cultivator. Aisle after aisle of colorful bottles of nutrients line the shelves and choosing from the hundreds of products can be daunting. If you find yourself just this shade of confused, I’d advise you to K.I.S.S, Keep It Simple Stupid. It’s easy to get carried away with all of the different products available but start with a simple growing style with easy recipes and nutrients that fit your budget. Each season, you’ll become more familiar with your equipment and can begin to branch out into new techiques and equipment. Growing can be expensive and understanding all of the input costs is crucial.

Integrated Pest Management (IPM)

BUGS, MOLD, and MILDEW! Everyone gets them so be aware. By the time you visually see you have an issue or outbreak the problem is already bad. Visit your local grow store or use Google to search the web and diagnose your problem. Once you have identified the issue, you can set a plan of attack in place to correct it. After you have the pest or pathogen under control, maintain a consistent schedule of treating your plants. Keeping your approach proactive versus reactive will serve your crop much better and your rate of success will be much improved. A reminder that poor environmental control can be the root cause of molds and mildews, so pay attention and manage temperature and humidity as an IPM protocol will only get you so far.

Genetics

When Colorado legalized medical cannabis, you could purchase clones from dispensaries. In those early days, I remember the feeding frenzy of strain collection. The grower community was eager to which varieties we could obtain and what their properties were. The quality of your genetics will dictate the quality of the end product. If you start with inferior genetics, you will end up with an inferior crop. So, do the research and find a reliable resource for your starting material whether it’s seeds or propagated clones.
As a side note, be very careful to vet your source plants. Many diseases and pests are passed along to growers when genetic exchanges occur. When receiving clones/plants be sure to inspect for pests and disease while following a strict IPM intake protocol for all new plants, utilizing a heavy dose of organic pesticides and fungicides.

Lighting

Lighting is a wormhole that you can get lost in while researching. Back in those early days of legalization, we only had access to metal halides and high-pressure sodium (HPS) lighting technology. Now there are hundreds of LED companies and products, not to mention many other types of lighting. Most lights will grow plants but finding the right light for your personal grow has many variables to take into consideration. First up, budget. HPS cost $300 to $500 a unit while some LED equivalents can cost up to $2000. Second is understanding your work space. One type of light may work better than another when considering low ceilings or lack of ventilation options.

Photographer: Jake Baum Grower: Kris “Sparky” Molskness


Resources

There is no better teacher than getting some dirt under your fingernails. Don’t be afraid to learn as you go in your garden. Successes may taste sweet, but failure brings the opportunity for deeper learning. Be sure to arm yourself with as much knowledge as you can. From print publications to online cannabis community forums, you’ll find a plethora of information—and opinions. Get to know the players and read some of the classics of modern cannabis cultivation like ‘Ed Rosenthal’s Marijuana Grower’s Handbook.’

There are thousands of YouTube videos discussing every topic you will ever need for growing. Some may be useful while others not so much. The more you learn from trusted resources, the more you’ll be able to see through flawed advice. YouTube is a great resource for sharing information, but it helps to know if the author is better at social media videos than they are growing cannabis.

ABOUT THE AUTHOR

Ellis Smith is co-founder and Chief Development Officer of American Cannabis Company (ACC). He has more than 20 years of horticulture experience in the specialty cut flower market, operating indoor gardens which helped him understand complex growing systems. As a cannabis grower, he developed an all natural soil medium known as SoHum Living Soil® which is used by hundreds of commercial cannabis operations. As CDO of ACC, Mr. Smith is also responsible for the design and construction of more than 1 million square feet of cannabis grow space in the U.S. and Canada.

Cloning 101

cannabis plants and how to clone

How Do You Clone Plants?

Cloning, also known as propagation, is not as hard as some folks make it out to be. With healthy plants, good techniques and environmental controls you can easily create many clones with ease. There are many things that can cause clones not to root and by having a clear checklist you can prevent clone loss and improve your technique for your business success. The information discussed below is not the actual steps to physically cutting a clone but things to think about when completing the task.

First you must start with healthy plant stock. Can I repeat, “You must start with healthy plant stock”! If you have mold or plants infested with pests then you will have a very hard time reproducing healthy roots and clones. If you have good Integrated Pest Management (IPM) protocol then you will see how much easier it is to reproduce healthy strong rooted clones. Dirty mother plants are the reason for perpetual pest problems, if you start with dirty mother plants then you can guarantee dirty infested clones. Stop the madness and don’t repeat the cycle…

Secondly, please be clean as possible. You don’t need to have vacuum hoods or take a physical shower to reduce contamination. What you do need to be cognizant of is using clean tools during the workflow process. Scissors, razor blades, or whatever you use for cutting should always be wiped down to clean the surface and disinfect. This simple task gets overlooked so many times and is usually one of the relevant issues for roots not popping on a clone. Dull scissors and razors are easy to replace also so don’t be cheap and spend the few dollars to guarantee you are working with the proper tools that are sharp.

Lastly, your environmental control settings with proper temperature and humidity needs to be precise when cloning. This is where many who attempt to clone fail. Too much humidity in your clone dome can cause water droplets to fall into the center of your clone and collect water to rot out the meristem. You will see yellowing from the center outward once this happens. In contrast, not enough humidity can reduce your success rate of root development since the plant has no other way of water uptake except through its leaves. Running higher temps in the 80 to 90s is great for root production but be cautious of cooler temps as this will slow down roots from growing.

Other cloning tricks…
-Use a heating pad for higher success rate.
-Turkey basters work great to help water your clones while in clone domes.
-Don’t be afraid to cut the leaf tips to allow for more area for water uptake while roots are forming.

ABOUT THE AUTHOR

Ellis Smith is co-founder and Chief Development Officer of American Cannabis Company (ACC). He has more than 20 years of horticulture experience in the specialty cut flower market, operating indoor gardens which helped him understand complex growing systems. As a cannabis grower, he developed an all natural soil medium known as SoHum Living Soil® which is used by hundreds of commercial cannabis operations. As CDO of ACC, Mr. Smith is also responsible for the design and construction of more than 1 million square feet of cannabis grow space in the U.S. and Canada.

Pruning & Training Cannabis Plants for Maximum Production

Growing cannabis can be an artful process. There are so many ways to grow the plant and so many different pruning techniques that can bring huge benefits when properly executed. I look at the cannabis plant like a bonsai tree in terms of allowing me to create the exact shape for function to produce the most flower. Pruning and training techniques are key when it comes to achieving maximum output.

Topping cannabis is simple and can be done relatively quick when executed properly. I like to start topping plants as soon as there are 5 nodes on the plant, this is usually a few days to a week after a clone has been transplanted/up potted into its new home for vegetative growth. By topping/removing the apical meristem or top node on the plant, you take away the apical dominance of the Christmas tree look and allow the plant to produce 2 branches where originally there was only 1. Once these 2 branches grow out to 4 to 5 nodes on each stem I will top/remove the apical meristem again to allow for more branching. I do this constantly in the vegetative stage when the plant allows at every 4th or 5th node. Seven days before I switch to flowering I will stop topping to allow for the new branches to reach 5 to 7 inches to ensure maximum yield.

My goal in topping is to produce as many tops or flower sites/grow points as possible. I want a busy plant with as many tops to fill in the empty space under its’ light source. During the first few weeks in flowering we see huge spikes/stretch in growth which requires more training to keep the plant canopy under the lighting footprint. From trellising, staking, and even using tomato cages you can begin to harness the plant canopy for your desired space. In order to increase more flowering sites, I like super crop or bend the tops of the plants to a 90 degree angle. This trick not only opens up the canopy to fill in empty spaces in your canopy it also allows for light penetration deeper into the canopy to assist with more production. You will also observe that when super cropping to a 90 degree angle the side nodes will turn upwards toward the light creating more opportunity for more flower production.

Topping, pruning, super cropping, whatever tricks you use and whatever you call them can bring added yields when applied correctly. Experiment and see how different strains respond. Not all strains are created equal so learn how each strain responds and zero in on what works and use it to your advantage. My pruning techniques allowed me to see anywhere from 20% to 30% increase in production. Don’t be afraid to see stress your plants and reap the rewards.

ABOUT THE AUTHOR

Ellis Smith is co-founder and Chief Development Officer of American Cannabis Company (ACC). He has more than 20 years of horticulture experience in the specialty cut flower market, operating indoor gardens which helped him understand complex growing systems. As a cannabis grower, he developed an all natural soil medium known as SoHum Living Soil® which is used by hundreds of commercial cannabis operations. As CDO of ACC, Mr. Smith is also responsible for the design and construction of more than 1 million square feet of cannabis grow space in the U.S. and Canada.

Trellising and Staking Cannabis Plants for Support

Cannabis plants can grow very tall and most likely will require you to give them some sort of support to keep from falling over causing irreversible damage to the plant. This support is crucial to ensure the crop can be systematically grown to its’ full potential until your desired harvest date. There are several methods that can be used to ensure the safety of your plants. Depending on the plant’s growth stage will determine the best time to set up a trellis or scrog (acronym for Screen of Green), use stakes, tomato cages or whatever else you have available that can support the plant. I have even seen growers place thumbtacks in the ceiling and tie strings to buds to provide support…so don’t be afraid to get creative with your plant management tactics.

My preferred method of growing requires that I set up trellising during the 2nd week of the flower stage. Due to the size plants, I am growing I will not need to support them until this stage. I usually see extreme growth early in flowering and wait until that growth slows before setting up the trellis/scrog. I personally prefer using trellising versus other methods of support as it is easier to install and work within indoor settings. Trellising provides more flexibility when rearranging the plant canopy, allowing more freedom when spreading out the canopy in ways that other support systems limit you. I also like how easily I can super crop tall stems under the trellis to ensure they hold in place due to the trellis to provide a higher flower count. See Pruning & Training Cannabis Plants for Maximum Production for details on this yield enhancement method.

Stakes are effective and can serve a great role in supporting plants however there are a few drawbacks when using them to scale into large facilities. The first concern is contamination as they must be cleaned and sterilized after each use to prevent any kind of cross-contamination on the next plants that will use them. The second concern in using stakes is a safety issue as stakes can puncture an eye very easily. In smaller grows and home grows I have learned over many times into the canopy only to catch a stake in the cheek or face narrowly missing my eye.

Tomato cages are a great support system as well and can be highly effective when used properly for plants grown outdoors. Once again, your plant’s size will determine when to start supporting. My preferred method for indoor grows start during the flower phase but when growing larger plants outdoors I start using tomato cages earlier in the vegetative stage, so I can support them plant against wind damage.

Supporting plants with trellis, tomato cages, stakes or whatever you use can bring great improvement in yields when applied properly. I have seen yield increases by up to 30% simply by just rearranging the canopy to maximize light exposure to the plant’s grow points. This is one of many methods you can use to increase productivity from your crop. Treat your plants like a bonsai tree and learn what it requires when trellising, staking or caging for maximum production.

ABOUT THE AUTHOR

Ellis Smith is co-founder and Chief Development Officer of American Cannabis Company (ACC). He has more than 20 years of horticulture experience in the specialty cut flower market, operating indoor gardens which helped him understand complex growing systems. As a cannabis grower, he developed an all natural soil medium known as SoHum Living Soil® which is used by hundreds of commercial cannabis operations. As CDO of ACC, Mr. Smith is also responsible for the design and construction of more than 1 million square feet of cannabis grow space in the U.S. and Canada.

When to Harvest 101

HARVEST….It’s the time you have been waiting for! In preparation for your big day, you will want to be sure to flush your plants with water only for at least 7 days prior to harvest to ensure the removal of any salt build up and remaining nutrients from the soil to reduce
the harsh sensation that may be experienced when smoking finished product. Ideally, by the time of harvest, your plants will be yellowing, further aiding in the reduction of any harsh flavor. Remember, flower will burn to white ash as an indicator that your plants have been
properly flushed. Please note that if you are using living soil as your selected medium, you will not experience any salt build-up and therefore will have no need to flush your plants.

Knowing when to harvest your cannabis does not need to be scary or overwhelming. As a grower, you have just spent the last 90 to 120 days taking care of clones or seedlings to create strong roots, vegging your plants to perfection and finally, flowering your plants for peak performance. So, when is the right time to harvest? There is no definitive answer as everyone has their own metrics and ideal characteristics for determining the best time for harvesting plants. The technique that I have developed through years of experience, is a combination of trial and error and the knowledge that has been bestowed upon me by masters of the craft.

Please utilize the following information as a basic guideline for monitoring your plant’s trichomes as you experiment to find what works best for your desired preference of your end-product. Trichomes (traɪkoʊmz or trɪkoʊmz), from the Greek τρίχωμα (trichōma) meaning “hair”, are fine outgrowths or appendages on plants, algae, lichens, and certain protists that are of diverse structure and function. On the cannabis plant, they are the source of the cannabinoids, the molecular chemical compounds such as THC, CBD, CBG, and CBC among others. In the final flowering stage trichomes appear clear like a crystal.

Step 1. Examine the trichomes, using a magnifying glass or scope for an enhanced view, to observe closely enough to allow you to see the full spectrum of color contained within.

Step 2. Through your magnified observations, trichomes should ideally appear as either clear, milky or cloudy in color, indicating that the plant is ripe and is ready to harvest. By contrast, clear color is a sign that trichomes are not yet ripe and are not ready for harvest. An amber color means the trichrome is naturally converting to CBN, which provides for a calming relaxing effect.

Step 3. Everyone has a different ideal trichome ratio, however, I look for at least 75% milky trichomes with roughly 5% to 10% turning amber in color, and the remaining trichomes being clear. Depending on the desired end effect when consumed, you can let the trichome ratio go up or down on the amber scale to give you a more relaxed experience with more amber trichomes versus a less relaxed experienced with fewer amber trichomes.

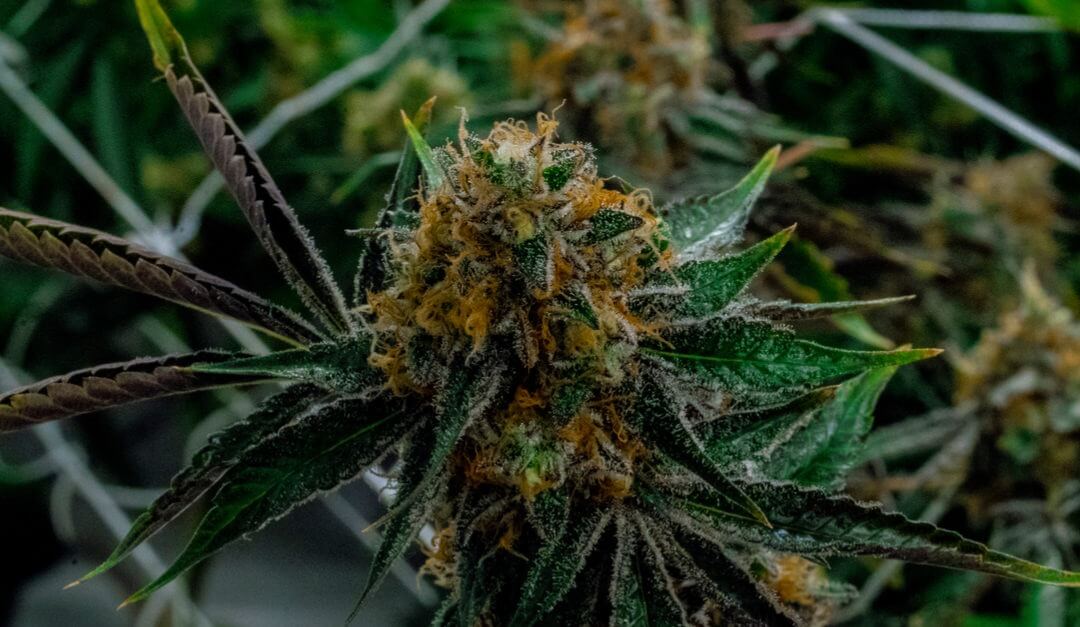
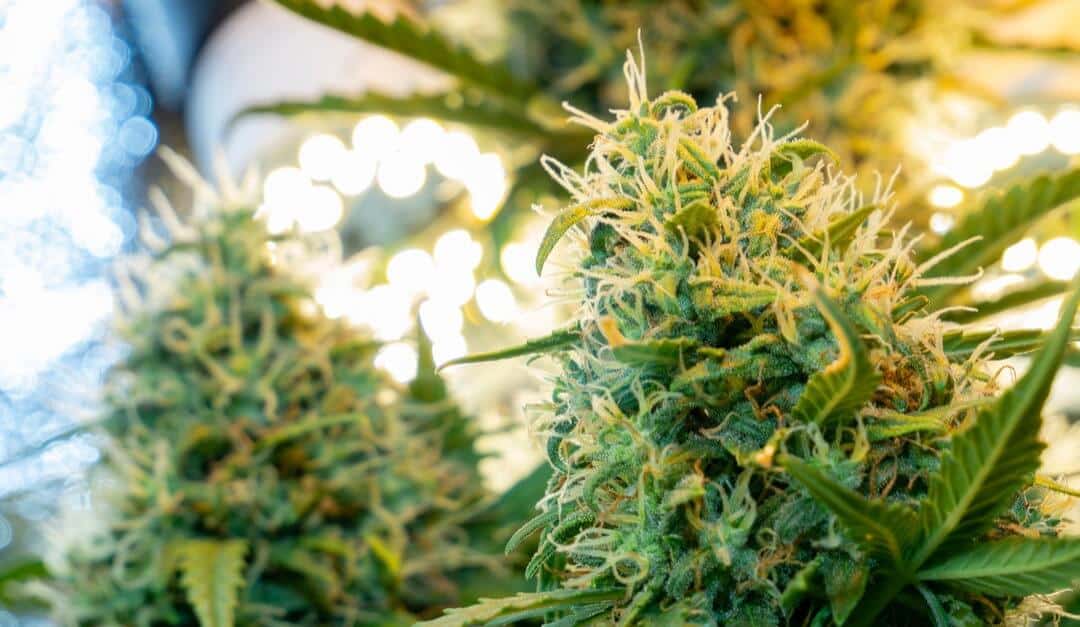
The white and/or red hairs, known as pistils, on the flowers are another vital indicator to identify when harvesting. These hairs will appear as white throughout most of the flower cycle, turning either yellow, orange and then finally red as the plant begins to mature. Most experienced growers will harvest at the plants’ peak potency when the hairs have turned 70% to 80% red. For new growers who are not sure when to harvest, wait for at least 50% of the hairs to turn red before harvesting. This will give you enough understanding of how to improve your process for the next harvest by adjusting the ratios for your desired results from the effects, taste, and experience.

Harvesting plants can be the most exciting time for a grower. Ensuring you harvest plants at their peak potency can be a calculated process with minimal trial and error. Get to know each strain and the unique characteristics and nuances that make each one unique and learn when the best time is to harvest for peak yield, cannabinoid profile, terpene expression, and overall performance.

Stay tuned for “How to Harvest” and “How to Cure”.

ABOUT THE AUTHOR

Ellis Smith is co-founder and Chief Development Officer of American Cannabis Company (ACC). He has more than 20 years of horticulture experience in the specialty cut flower market, operating indoor gardens which helped him understand complex growing systems. As a cannabis grower, he developed an all natural soil medium known as SoHum Living Soil® which is used by hundreds of commercial cannabis operations. As CDO of ACC, Mr. Smith is also responsible for the design and construction of more than 1 million square feet of cannabis grow space in the U.S. and Canada.